Create a DApp with Viem
IntermediatePolkaVM Preview Release
PolkaVM smart contracts with Ethereum compatibility are in early-stage development and may be unstable or incomplete.
Decentralized applications (dApps) are a key component of the Web3 ecosystem, enabling developers to build applications that communicate directly with blockchain networks. Polkadot Hub, a blockchain with smart contract support, serves as a robust platform for deploying and interacting with dApps.
This tutorial will guide you through building a fully functional dApp that interacts with a smart contract on Polkadot Hub. You'll use Viem for blockchain interactions and Next.js for the frontend. By the end, you'll have a dApp that lets users connect their wallets, retrieve on-chain data, and execute transactions.
Prerequisites
Before getting started, ensure you have the following:
- Node.js v16 or later installed on your system
- A crypto wallet (such as MetaMask) funded with test tokens. Refer to the Connect to Polkadot guide for more details
- A basic understanding of React and JavaScript
- Some familiarity with blockchain fundamentals and Solidity (useful but not required)
Project Overview
This dApp will interact with a basic Storage contract. Refer to the Create Contracts tutorial for a step-by-step guide on creating this contract. The contract allows:
- Retrieving a stored number from the blockchain
- Updating the stored number with a new value
Below is a high-level overview of what you'll be building:

Your project directory will be organized as follows:
viem-dapp
├── abis
│   └── Storage.json
└── app
    ├── components
    │   ├── ReadContract.tsx
    │   ├── WalletConnect.tsx
    │   └── WriteContract.tsx
    ├── favicon.ico
    ├── globals.css
    ├── layout.tsx
    ├── page.tsx
    └── utils
        ├── contract.ts
        └── viem.ts
Set Up the Project
Create a new Next.js project:
Install Dependencies
Install viem and related packages:
Connect to Polkadot Hub
To interact with Polkadot Hub, you need to set up a Public Client that connects to the blockchain. In this example, you will interact with the Polkadot Hub TestNet, so you can experiment safely. Start by creating a new file called utils/viem.ts and add the following code:
import { createPublicClient, http, createWalletClient, custom } from 'viem'
import 'viem/window';


const transport = http('https://testnet-passet-hub-eth-rpc.polkadot.io')

// Configure the Passet Hub chain
export const passetHub = {
  id: 420420422,
  name: 'Passet Hub',
  network: 'passet-hub',
  nativeCurrency: {
    decimals: 18,
    name: 'PAS',
    symbol: 'PAS',
  },
  rpcUrls: {
    default: {
      http: ['https://testnet-passet-hub-eth-rpc.polkadot.io'],
    },
  },
} as const

// Create a public client for reading data
export const publicClient = createPublicClient({
  chain: passetHub,
  transport
})

// Create a wallet client for signing transactions
export const getWalletClient = async () => {
  if (typeof window !== 'undefined' && window.ethereum) {
    const [account] = await window.ethereum.request({ method: 'eth_requestAccounts' });
    return createWalletClient({
      chain: passetHub,
      transport: custom(window.ethereum),
      account,
    });
  }
  throw new Error('No Ethereum browser provider detected');
};
This file initializes a viem client, providing helper functions for obtaining a Public Client and a Wallet Client. The Public Client enables reading blockchain data, while the Wallet Client allows users to sign and send transactions. Also, note that by importing 'viem/window' the global window.ethereum will be typed as an EIP1193Provider, check the window Polyfill reference for more information.
Set Up the Smart Contract Interface
For this dApp, you'll use a simple Storage contract that's already deployed in the Polkadot Hub TestNet: 0x58053f0e8ede1a47a1af53e43368cd04ddcaf66f. To interact with it, you need to define the contract interface.
Create a folder called abis at the root of your project, then create a file named Storage.json and paste the corresponding ABI (Application Binary Interface) of the Storage contract. You can copy and paste the following:
Storage.sol ABI
[
    {
        "inputs": [
            {
                "internalType": "uint256",
                "name": "_newNumber",
                "type": "uint256"
            }
        ],
        "name": "setNumber",
        "outputs": [],
        "stateMutability": "nonpayable",
        "type": "function"
    },
    {
        "inputs": [],
        "name": "storedNumber",
        "outputs": [
            {
                "internalType": "uint256",
                "name": "",
                "type": "uint256"
            }
        ],
        "stateMutability": "view",
        "type": "function"
    }
]
Next, create a file called utils/contract.ts:
import { getContract } from 'viem';
import { publicClient, getWalletClient } from './viem';
import StorageABI from '../../abis/Storage.json';

export const CONTRACT_ADDRESS = '0x58053f0e8ede1a47a1af53e43368cd04ddcaf66f';
export const CONTRACT_ABI = StorageABI;

// Create a function to get a contract instance for reading
export const getContractInstance = () => {
  return getContract({
    address: CONTRACT_ADDRESS,
    abi: CONTRACT_ABI,
    client: publicClient,
  });
};

// Create a function to get a contract instance with a signer for writing
export const getSignedContract = async () => {
  const walletClient = await getWalletClient();
  return getContract({
    address: CONTRACT_ADDRESS,
    abi: CONTRACT_ABI,
    client: walletClient,
  });
};
This file defines the contract address, ABI, and functions to create a viem contract instance for reading and writing operations. viem's contract utilities ensure a more efficient and type-safe interaction with smart contracts.
Create the Wallet Connection Component
Now, let's create a component to handle wallet connections. Create a new file called components/WalletConnect.tsx:
"use client";

import React, { useState, useEffect } from "react";
import { passetHub } from "../utils/viem";

interface WalletConnectProps {
  onConnect: (account: string) => void;
}

const WalletConnect: React.FC<WalletConnectProps> = ({ onConnect }) => {
  const [account, setAccount] = useState<string | null>(null);
  const [chainId, setChainId] = useState<number | null>(null);
  const [error, setError] = useState<string | null>(null);

  useEffect(() => {
    // Check if user already has an authorized wallet connection
    const checkConnection = async () => {
      if (typeof window !== 'undefined' && window.ethereum) {
        try {
          // eth_accounts doesn't trigger the wallet popup
          const accounts = await window.ethereum.request({
            method: 'eth_accounts',
          }) as string[];

          if (accounts.length > 0) {
            setAccount(accounts[0]);
            const chainIdHex = await window.ethereum.request({
              method: 'eth_chainId',
            }) as string;
            setChainId(parseInt(chainIdHex, 16));
            onConnect(accounts[0]);
          }
        } catch (err) {
          console.error('Error checking connection:', err);
          setError('Failed to check wallet connection');
        }
      }
    };

    checkConnection();

    if (typeof window !== 'undefined' && window.ethereum) {
      // Setup wallet event listeners
      window.ethereum.on('accountsChanged', (accounts: string[]) => {
        setAccount(accounts[0] || null);
        if (accounts[0]) onConnect(accounts[0]);
      });

      window.ethereum.on('chainChanged', (chainIdHex: string) => {
        setChainId(parseInt(chainIdHex, 16));
      });
    }

    return () => {
      // Cleanup event listeners
      if (typeof window !== 'undefined' && window.ethereum) {
        window.ethereum.removeListener('accountsChanged', () => {});
        window.ethereum.removeListener('chainChanged', () => {});
      }
    };
  }, [onConnect]);

  const connectWallet = async () => {
    if (typeof window === 'undefined' || !window.ethereum) {
      setError(
        'MetaMask not detected! Please install MetaMask to use this dApp.'
      );
      return;
    }

    try {
      // eth_requestAccounts triggers the wallet popup
      const accounts = await window.ethereum.request({
        method: 'eth_requestAccounts',
      }) as string[];

      setAccount(accounts[0]);

      const chainIdHex = await window.ethereum.request({
        method: 'eth_chainId',
      }) as string;

      const currentChainId = parseInt(chainIdHex, 16);
      setChainId(currentChainId);

      // Prompt user to switch networks if needed
      if (currentChainId !== passetHub.id) {
        await switchNetwork();
      }

      onConnect(accounts[0]);
    } catch (err) {
      console.error('Error connecting to wallet:', err);
      setError('Failed to connect wallet');
    }
  };

  const switchNetwork = async () => {
    console.log('Switch network')
    try {
      await window.ethereum.request({
        method: 'wallet_switchEthereumChain',
        params: [{ chainId: `0x${passetHub.id.toString(16)}` }],
      });
    } catch (switchError: any) {
      // Error 4902 means the chain hasn't been added to MetaMask
      if (switchError.code === 4902) {
        try {
          await window.ethereum.request({
            method: 'wallet_addEthereumChain',
            params: [
              {
                chainId: `0x${passetHub.id.toString(16)}`,
                chainName: passetHub.name,
                rpcUrls: [passetHub.rpcUrls.default.http[0]],
                nativeCurrency: {
                  name: passetHub.nativeCurrency.name,
                  symbol: passetHub.nativeCurrency.symbol,
                  decimals: passetHub.nativeCurrency.decimals,
                },
              },
            ],
          });
        } catch (addError) {
          setError('Failed to add network to wallet');
        }
      } else {
        setError('Failed to switch network');
      }
    }
  };

  // UI-only disconnection - MetaMask doesn't support programmatic disconnection
  const disconnectWallet = () => {
    setAccount(null);
  };

  return (
    <div className="border border-pink-500 rounded-lg p-4 shadow-md bg-white text-pink-500 max-w-sm mx-auto">
      {error && <p className="text-red-500 text-sm mb-2">{error}</p>}

      {!account ? (
        <button
          onClick={connectWallet}
          className="w-full bg-pink-500 hover:bg-pink-600 text-white font-bold py-2 px-4 rounded-lg transition"
        >
          Connect Wallet
        </button>
      ) : (
        <div className="flex flex-col items-center">
          <span className="text-sm font-mono bg-pink-100 px-2 py-1 rounded-md text-pink-700">
            {`${account.substring(0, 6)}...${account.substring(38)}`}
          </span>
          <button
            onClick={disconnectWallet}
            className="mt-3 w-full bg-gray-200 hover:bg-gray-300 text-pink-500 py-2 px-4 rounded-lg transition"
          >
            Disconnect
          </button>
          {chainId !== passetHub.id && (
            <button
              onClick={switchNetwork}
              className="mt-3 w-full bg-yellow-500 hover:bg-yellow-600 text-white font-bold py-2 px-4 rounded-lg transition"
            >
              Switch to Passet Hub
            </button>
          )}
        </div>
      )}
    </div>
  );
};

export default WalletConnect;
This component handles connecting to the wallet, switching networks if necessary, and keeping track of the connected account. It provides a button for users to connect their wallet and displays the connected account address once connected.
To use this component in your dApp, replace the existing boilerplate in app/page.tsx with the following code:
import WalletConnect from "./components/WalletConnect";

export default function Home() {
  const [account, setAccount] = useState<string | null>(null);

  const handleConnect = (connectedAccount: string) => {
    setAccount(connectedAccount);
  };

  return (
    <section className="min-h-screen bg-white text-black flex flex-col justify-center items-center gap-4 py-10">
      <h1 className="text-2xl font-semibold text-center">
        Viem dApp - Passet Hub Smart Contracts
      </h1>
      <WalletConnect onConnect={handleConnect} />
    </section>
  );
}
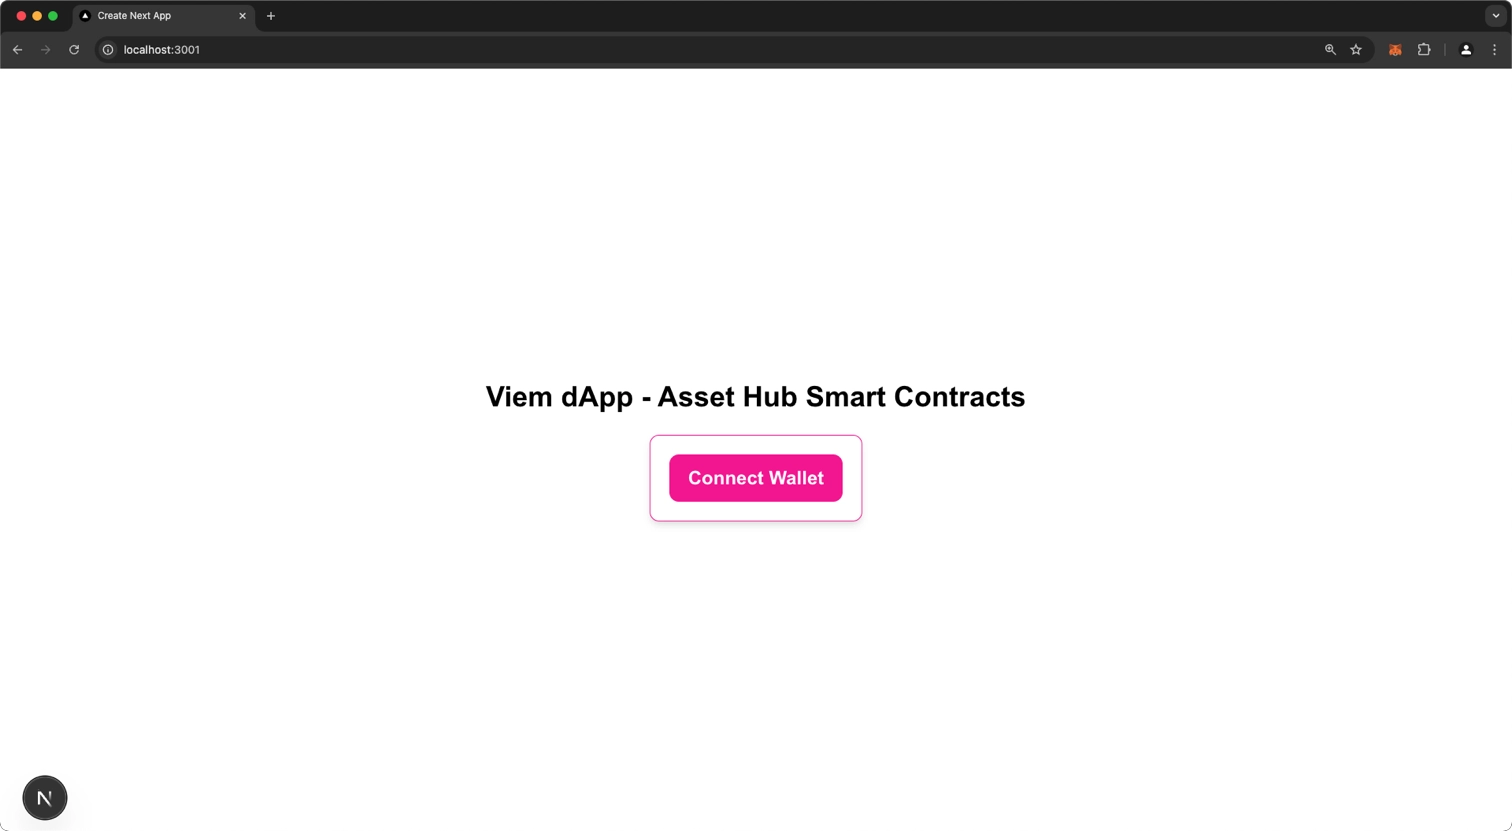
Now you're ready to run your dApp. From your project directory, execute:
Navigate to http://localhost:3000 in your browser, and you should see your dApp with the wallet connection button, the stored number display, and the form to update the number.
Create the Read Contract Component
Now, let's create a component to read data from the contract. Create a file called components/ReadContract.tsx:
'use client';

import React, { useState, useEffect } from 'react';
import { publicClient } from '../utils/viem';
import { CONTRACT_ADDRESS, CONTRACT_ABI } from '../utils/contract';

const ReadContract: React.FC = () => {
  const [storedNumber, setStoredNumber] = useState<string | null>(null);
  const [loading, setLoading] = useState<boolean>(true);
  const [error, setError] = useState<string | null>(null);

  useEffect(() => {
    // Function to read data from the blockchain
    const fetchData = async () => {
      try {
        setLoading(true);
        // Call the smart contract's storedNumber function
        const number = await publicClient.readContract({
            address: CONTRACT_ADDRESS,
            abi: CONTRACT_ABI,
            functionName: 'storedNumber',
            args: [],
          }) as bigint;

        setStoredNumber(number.toString());
        setError(null);
      } catch (err) {
        console.error('Error fetching stored number:', err);
        setError('Failed to fetch data from the contract');
      } finally {
        setLoading(false);
      }
    };

    fetchData();

    // Poll for updates every 10 seconds to keep UI in sync with blockchain
    const interval = setInterval(fetchData, 10000);

    // Clean up interval on component unmount
    return () => clearInterval(interval);
  }, []);

  return (
    <div className="border border-pink-500 rounded-lg p-4 shadow-md bg-white text-pink-500 max-w-sm mx-auto">
      <h2 className="text-lg font-bold text-center mb-4">Contract Data</h2>
      {loading ? (
        <div className="flex justify-center my-4">
          <div className="w-6 h-6 border-4 border-pink-500 border-t-transparent rounded-full animate-spin"></div>
        </div>
      ) : error ? (
        <p className="text-red-500 text-center">{error}</p>
      ) : (
        <div className="text-center">
          <p className="text-sm font-mono bg-pink-100 px-2 py-1 rounded-md text-pink-700">
            <strong>Stored Number:</strong> {storedNumber}
          </p>
        </div>
      )}
    </div>
  );
};

export default ReadContract;
This component reads the storedNumber value from the contract and displays it to the user. It also sets up a polling interval to refresh the data periodically, ensuring that the UI stays in sync with the blockchain state.
To reflect this change in your dApp, incorporate this component into the app/page.tsx file.
import ReadContract from "./components/ReadContract";

export default function Home() {
  const [account, setAccount] = useState<string | null>(null);

  const handleConnect = (connectedAccount: string) => {
    setAccount(connectedAccount);
  };

  return (
    <section className="min-h-screen bg-white text-black flex flex-col justify-center items-center gap-4 py-10">
      <h1 className="text-2xl font-semibold text-center">
        Viem dApp - Passet Hub Smart Contracts
      </h1>
      <WalletConnect onConnect={handleConnect} />
      <ReadContract />
    </section>
  );
}
And you will see in your browser:

Create the Write Contract Component
Finally, let's create a component that allows users to update the stored number. Create a file called components/WriteContract.tsx:
"use client";

import React, { useState, useEffect } from "react";
import { publicClient, getWalletClient } from "../utils/viem";
import { CONTRACT_ADDRESS, CONTRACT_ABI } from "../utils/contract";

interface WriteContractProps {
  account: string | null;
}

const WriteContract: React.FC<WriteContractProps> = ({ account }) => {
  const [newNumber, setNewNumber] = useState<string>("");
  const [status, setStatus] = useState<{
    type: string | null;
    message: string;
  }>({
    type: null,
    message: "",
  });
  const [isSubmitting, setIsSubmitting] = useState<boolean>(false);
  const [isCorrectNetwork, setIsCorrectNetwork] = useState<boolean>(true);

  // Check if the account is on the correct network
  useEffect(() => {
    const checkNetwork = async () => {
      if (!account) return;

      try {
        // Get the chainId from the public client
        const chainId = await publicClient.getChainId();

        // Get the user's current chainId from their wallet
        const walletClient = await getWalletClient();
        if (!walletClient) return;

        const walletChainId = await walletClient.getChainId();

        // Check if they match
        setIsCorrectNetwork(chainId === walletChainId);
      } catch (err) {
        console.error("Error checking network:", err);
        setIsCorrectNetwork(false);
      }
    };

    checkNetwork();
  }, [account]);

  const handleSubmit = async (e: React.FormEvent) => {
    e.preventDefault();

    // Validation checks
    if (!account) {
      setStatus({ type: "error", message: "Please connect your wallet first" });
      return;
    }

    if (!isCorrectNetwork) {
      setStatus({
        type: "error",
        message: "Please switch to the correct network in your wallet",
      });
      return;
    }

    if (!newNumber || isNaN(Number(newNumber))) {
      setStatus({ type: "error", message: "Please enter a valid number" });
      return;
    }

    try {
      setIsSubmitting(true);
      setStatus({ type: "info", message: "Initiating transaction..." });

      // Get wallet client for transaction signing
      const walletClient = await getWalletClient();

      if (!walletClient) {
        setStatus({ type: "error", message: "Wallet client not available" });
        return;
      }

      // Check if account matches
      if (
        walletClient.account?.address.toLowerCase() !== account.toLowerCase()
      ) {
        setStatus({
          type: "error",
          message:
            "Connected wallet account doesn't match the selected account",
        });
        return;
      }

      // Prepare transaction and wait for user confirmation in wallet
      setStatus({
        type: "info",
        message: "Please confirm the transaction in your wallet...",
      });

      // Simulate the contract call first
      console.log('newNumber', newNumber);
      const { request } = await publicClient.simulateContract({
        address: CONTRACT_ADDRESS,
        abi: CONTRACT_ABI,
        functionName: "setNumber",
        args: [BigInt(newNumber)],
        account: walletClient.account,
      });

      // Send the transaction with wallet client
      const hash = await walletClient.writeContract(request);

      // Wait for transaction to be mined
      setStatus({
        type: "info",
        message: "Transaction submitted. Waiting for confirmation...",
      });

      const receipt = await publicClient.waitForTransactionReceipt({
        hash,
      });

      setStatus({
        type: "success",
        message: `Transaction confirmed! Transaction hash: ${receipt.transactionHash}`,
      });

      setNewNumber("");
    } catch (err: any) {
      console.error("Error updating number:", err);

      // Handle specific errors
      if (err.code === 4001) {
        // User rejected transaction
        setStatus({ type: "error", message: "Transaction rejected by user." });
      } else if (err.message?.includes("Account not found")) {
        // Account not found on the network
        setStatus({
          type: "error",
          message:
            "Account not found on current network. Please check your wallet is connected to the correct network.",
        });
      } else if (err.message?.includes("JSON is not a valid request object")) {
        // JSON error - specific to your current issue
        setStatus({
          type: "error",
          message:
            "Invalid request format. Please try again or contact support.",
        });
      } else {
        // Other errors
        setStatus({
          type: "error",
          message: `Error: ${err.message || "Failed to send transaction"}`,
        });
      }
    } finally {
      setIsSubmitting(false);
    }
  };

  return (
    <div className="border border-pink-500 rounded-lg p-4 shadow-md bg-white text-pink-500 max-w-sm mx-auto space-y-4">
      <h2 className="text-lg font-bold">Update Stored Number</h2>

      {!isCorrectNetwork && account && (
        <div className="p-2 rounded-md bg-yellow-100 text-yellow-700 text-sm">
          ⚠️ You are not connected to the correct network. Please switch
          networks in your wallet.
        </div>
      )}

      {status.message && (
        <div
          className={`p-2 rounded-md break-words h-fit text-sm ${
            status.type === "error"
              ? "bg-red-100 text-red-500"
              : status.type === "success"
              ? "bg-green-100 text-green-700"
              : "bg-blue-100 text-blue-700"
          }`}
        >
          {status.message}
        </div>
      )}

      <form onSubmit={handleSubmit} className="space-y-4">
        <input
          type="number"
          placeholder="New Number"
          value={newNumber}
          onChange={(e) => setNewNumber(e.target.value)}
          disabled={isSubmitting || !account}
          className="w-full p-2 border rounded-md focus:outline-none focus:ring-2 focus:ring-pink-400"
        />
        <button
          type="submit"
          disabled={
            isSubmitting || !account || (!isCorrectNetwork && !!account)
          }
          className="w-full bg-pink-500 hover:bg-pink-600 text-white font-bold py-2 px-4 rounded-lg transition disabled:bg-gray-300"
        >
          {isSubmitting ? "Updating..." : "Update"}
        </button>
      </form>

      {!account && (
        <p className="text-sm text-gray-500">
          Connect your wallet to update the stored number.
        </p>
      )}
    </div>
  );
};

export default WriteContract;
This component allows users to input a new number and send a transaction to update the value stored in the contract. It provides appropriate feedback during each step of the transaction process and handles error scenarios.
Update the app/page.tsx file to integrate all components:
"use client";

import { useState } from "react";
import WalletConnect from "./components/WalletConnect";
import ReadContract from "./components/ReadContract";
import WriteContract from "./components/WriteContract";

export default function Home() {
  const [account, setAccount] = useState<string | null>(null);

  const handleConnect = (connectedAccount: string) => {
    setAccount(connectedAccount);
  };

  return (
    <section className="min-h-screen bg-white text-black flex flex-col justify-center items-center gap-4 py-10">
      <h1 className="text-2xl font-semibold text-center">
        Viem dApp - Passet Hub Smart Contracts
      </h1>
      <WalletConnect onConnect={handleConnect} />
      <ReadContract />
      <WriteContract account={account} />
    </section>
  );
}

How It Works
Let's examine how the dApp interacts with the blockchain:
-
Wallet Connection:
- The
WalletConnectcomponent uses the browser's Ethereum provider (MetaMask) to connect to the user's wallet - It handles network switching to ensure the user is connected to the Polkadot Hub TestNet
- Once connected, it provides the user's account address to the parent component
- The
-
Reading Data:
- The
ReadContractcomponent uses viem'sreadContractfunction to call thestoredNumberview function - It periodically polls for updates to keep the UI in sync with the blockchain state
- The component displays a loading indicator while fetching data and handles error states
- The
-
Writing Data:
- The
WriteContractcomponent uses viem'swriteContractfunction to send a transaction to thesetNumberfunction - It ensures the wallet is connected before allowing a transaction
- The component shows detailed feedback during transaction submission and confirmation
- After a successful transaction, the value displayed in the
ReadContractcomponent will update on the next poll
- The
Conclusion
Congratulations! You've successfully built a fully functional dApp that interacts with a smart contract on Polkadot Hub using viem and Next.js. Your application can now:
- Connect to a user's wallet and handle network switching
- Read data from a smart contract and keep it updated
- Write data to the blockchain through transactions
These fundamental skills provide the foundation for building more complex dApps on Polkadot Hub. With this knowledge, you can extend your application to interact with more sophisticated smart contracts and create advanced user interfaces.
To get started right away with a working example, you can clone the repository and navigate to the implementation:
git clone https://github.com/polkadot-developers/polkavm-storage-contract-dapps.git -b v0.0.2
cd polkavm-storage-contract-dapps/viem-dapp
Where to Go Next
-
Guide Create a dApp with Wagmi
Learn how to build a decentralized application by using the Wagmi framework.
| Created: July 1, 2025