Deploy an NFT to Polkadot Hub
BeginnerPolkaVM Preview Release
PolkaVM smart contracts with Ethereum compatibility are in early-stage development and may be unstable or incomplete.
Introduction
Non-Fungible Tokens (NFTs) represent unique digital assets commonly used for digital art, collectibles, gaming, and identity verification. Polkadot Hub supports Ethereum-compatible smart contracts through PolkaVM, enabling straightforward NFT deployment.
This tutorial guides you through deploying an ERC-721 NFT contract on the Polkadot Hub TestNet using the Polkadot Remix IDE, a web-based development environment. To ensure security and standard compliance, it uses OpenZeppelin's NFT contracts implementation.
Prerequisites
Before starting, make sure you have:
- Talisman installed and connected to the Polkadot Hub TestNet. Check the Connect to Polkadot guide for more information
- A funded account with some PAS tokens (you can get them from the Faucet, noting that the faucet imposes a daily token limit, which may require multiple requests to obtain sufficient funds for testing)
- Basic understanding of Solidity and NFTs, see the Solidity Basics and the NFT Overview guides for more details
Create the NFT Contract
To create the NFT contract, you can follow the steps below:
- Navigate to the Polkadot Remix IDE
-
Click in the Create new file button under the contracts folder, and name your contract as
MyNFT.sol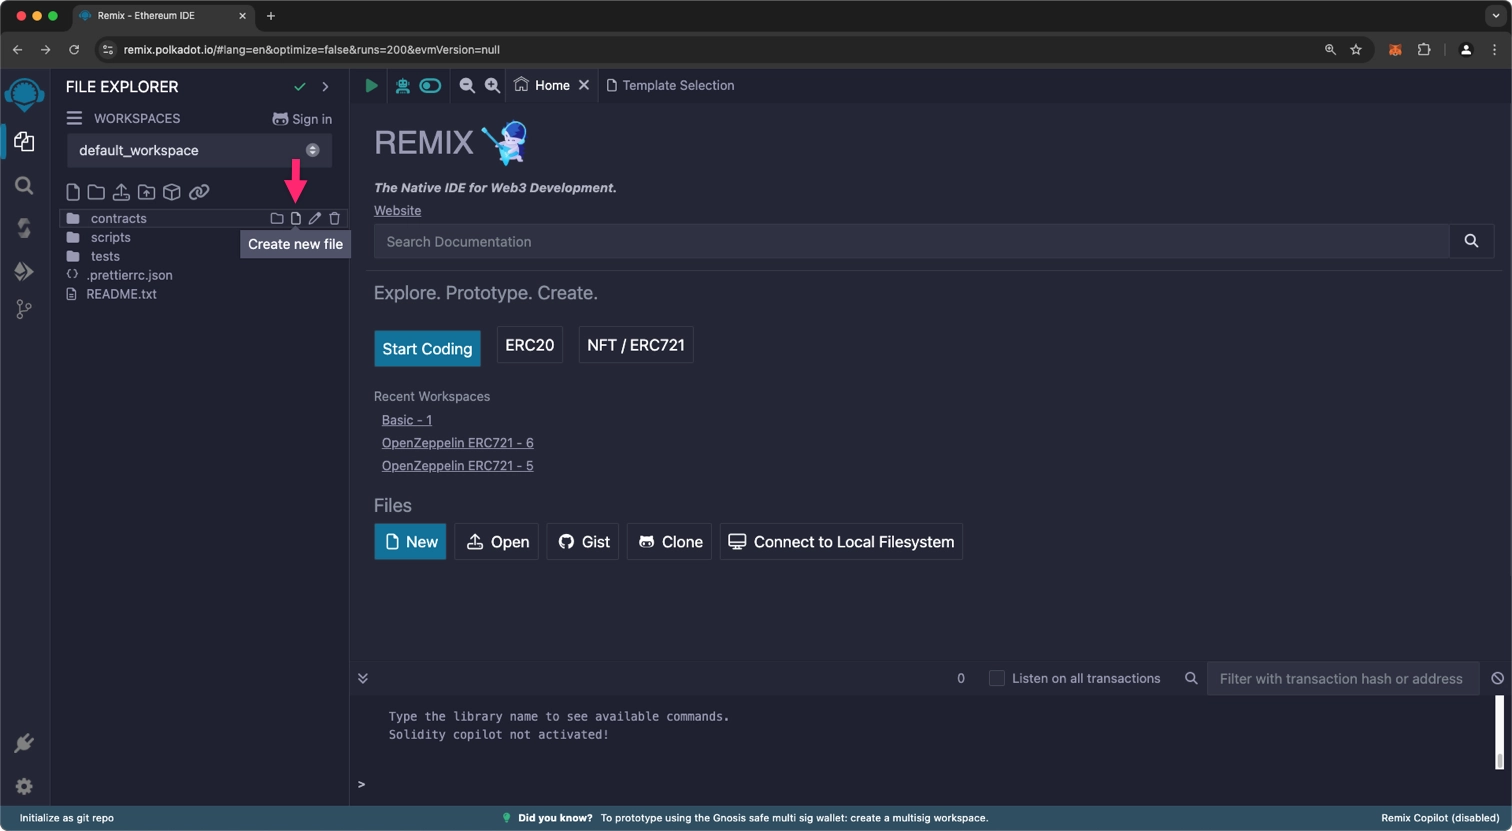
-
Now, paste the following NFT contract code into the editor
MyNFT.sol// SPDX-License-Identifier: MIT // Compatible with OpenZeppelin Contracts ^5.0.0 pragma solidity ^0.8.22; import {ERC721} from "@openzeppelin/contracts/token/ERC721/ERC721.sol"; import {Ownable} from "@openzeppelin/contracts/access/Ownable.sol"; contract MyToken is ERC721, Ownable { uint256 private _nextTokenId; constructor(address initialOwner) ERC721("MyToken", "MTK") Ownable(initialOwner) {} function safeMint(address to) public onlyOwner { uint256 tokenId = _nextTokenId++; _safeMint(to, tokenId); } }The key components of the code above are:
-
Contract imports
ERC721.sol- the base contract for non-fungible tokens, implementing core NFT functionality like transfers and approvalsOwnable.sol- provides basic authorization control, ensuring only the contract owner can mint new tokens
-
Constructor parameters
initialOwner- sets the address that will have administrative rights over the contract"MyToken"- the full name of your NFT collection"MTK"- the symbol representing your token in wallets and marketplaces
-
Key functions
_safeMint(to, tokenId)- an internal function fromERC721that safely mints new tokens. It includes checks to ensure the recipient can handleERC721tokens, with the_nextTokenIdmechanism automatically generating unique sequential token IDs and theonlyOwnermodifier restricting minting rights to the contract owner- Inherited Standard ERC721 functions provide a standardized set of methods that enable interoperability across different platforms, wallets, and marketplaces, ensuring that your NFT can be easily transferred, traded, and managed by any system that supports the
ERC721standard:transferFrom(address from, address to, uint256 tokenId)- transfers a specific NFT from one address to anothersafeTransferFrom(address from, address to, uint256 tokenId)- safely transfers an NFT, including additional checks to prevent lossapprove(address to, uint256 tokenId)- grants permission for another address to transfer a specific NFTsetApprovalForAll(address operator, bool approved)- allows an address to manage all of the owner's NFTsbalanceOf(address owner)- returns the number of NFTs owned by a specific addressownerOf(uint256 tokenId)- returns the current owner of a specific NFT
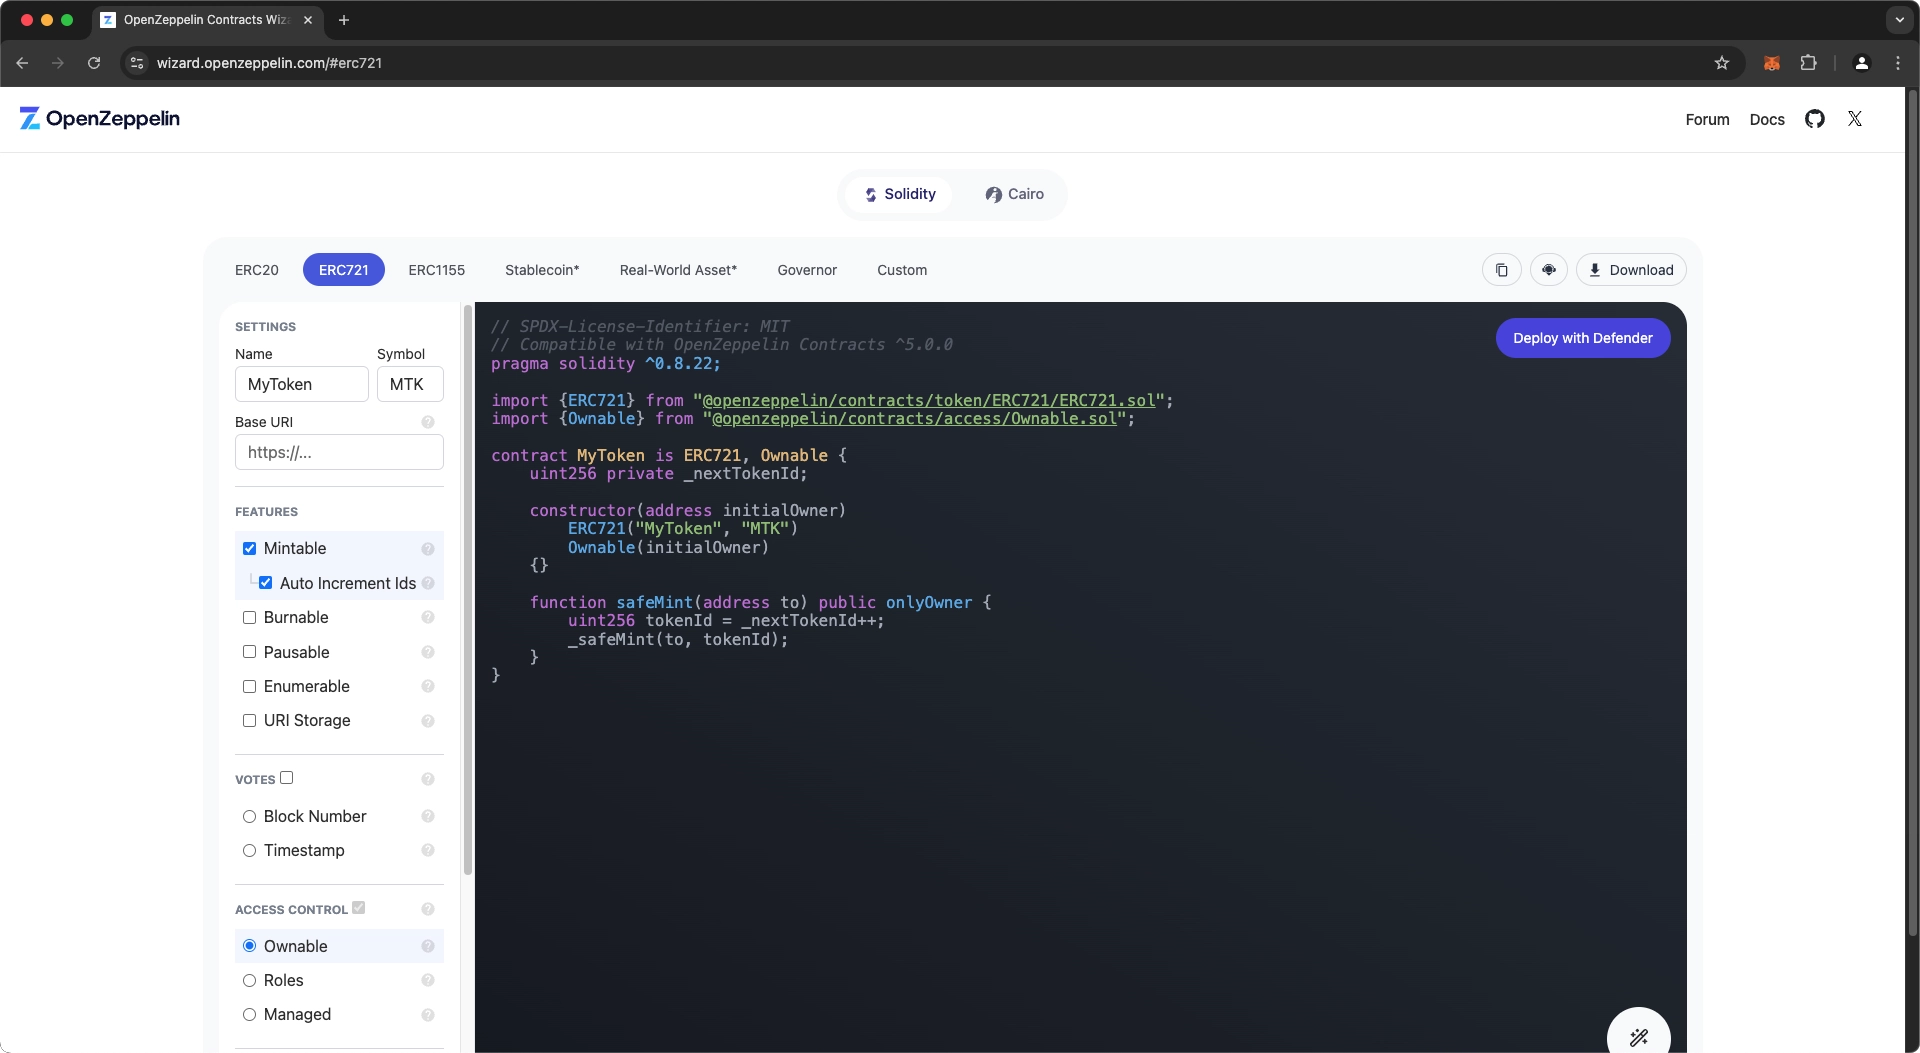
Tip
Use the OpenZeppelin Contracts Wizard to generate customized smart contracts quickly. Simply configure your contract, copy the generated code, and paste it into Polkadot Remix IDE for deployment. Below is an example of an ERC-721 token contract created with it:
-
Compile the Contract
Compilation is a stage that converts your Solidity source code into bytecode suitable for deployment on the blockchain. Throughout this process, the compiler examines your contract for syntax errors, verifies type safety, and produces machine-readable instructions for execution on the blockchain.
-
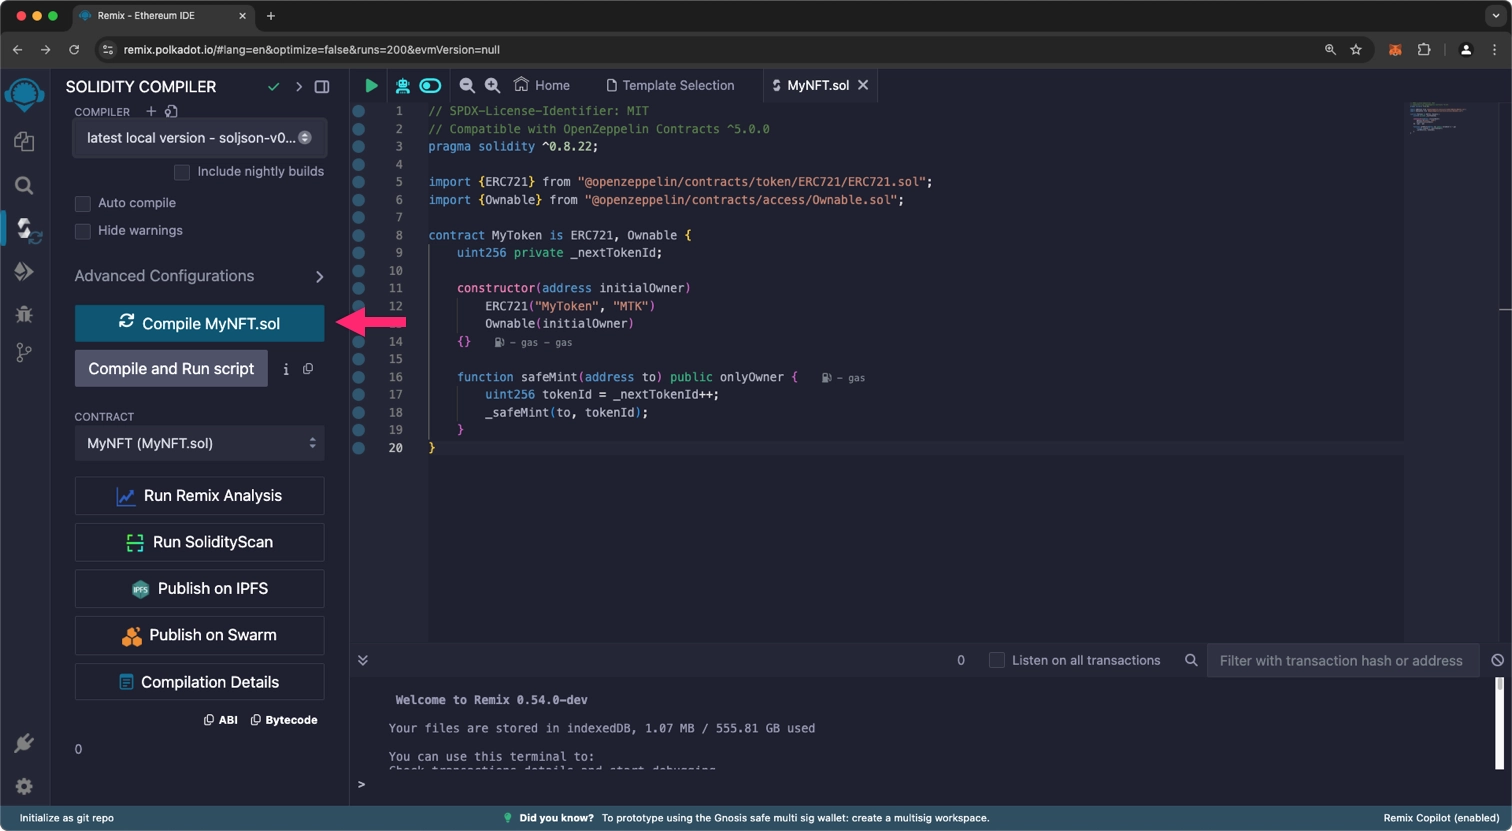
Select the Solidity Compiler plugin from the left panel

-
Click in the Compile MyNFT.sol button
-
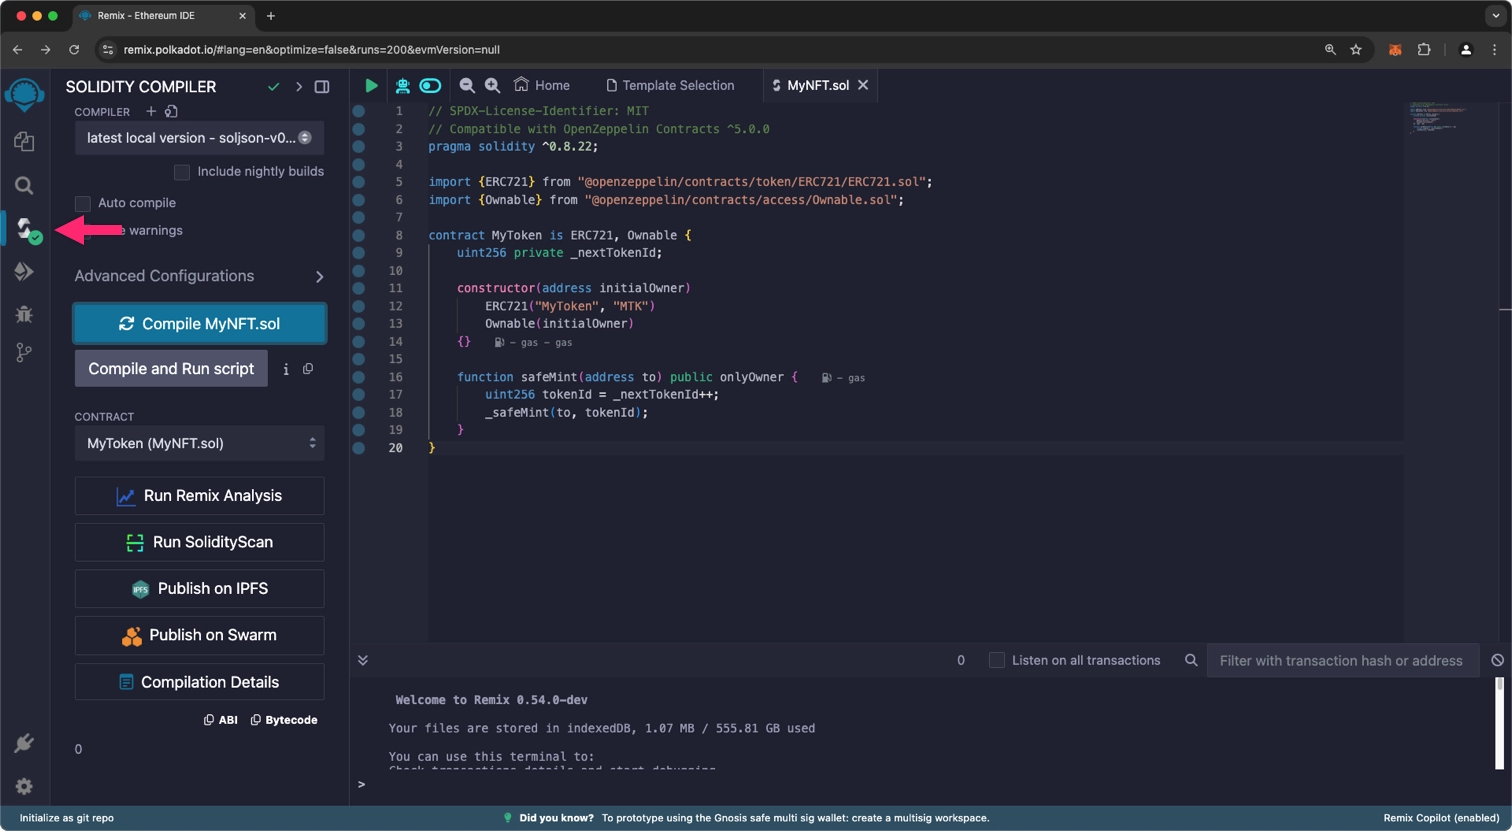
If the compilation succeeded, you can see a green checkmark indicating success in the Solidity Compiler icon
Deploy the Contract
Deployment is the process of uploading your compiled smart contract to the blockchain, allowing for interaction. During deployment, you will instantiate your contract on the blockchain, which involves:
-
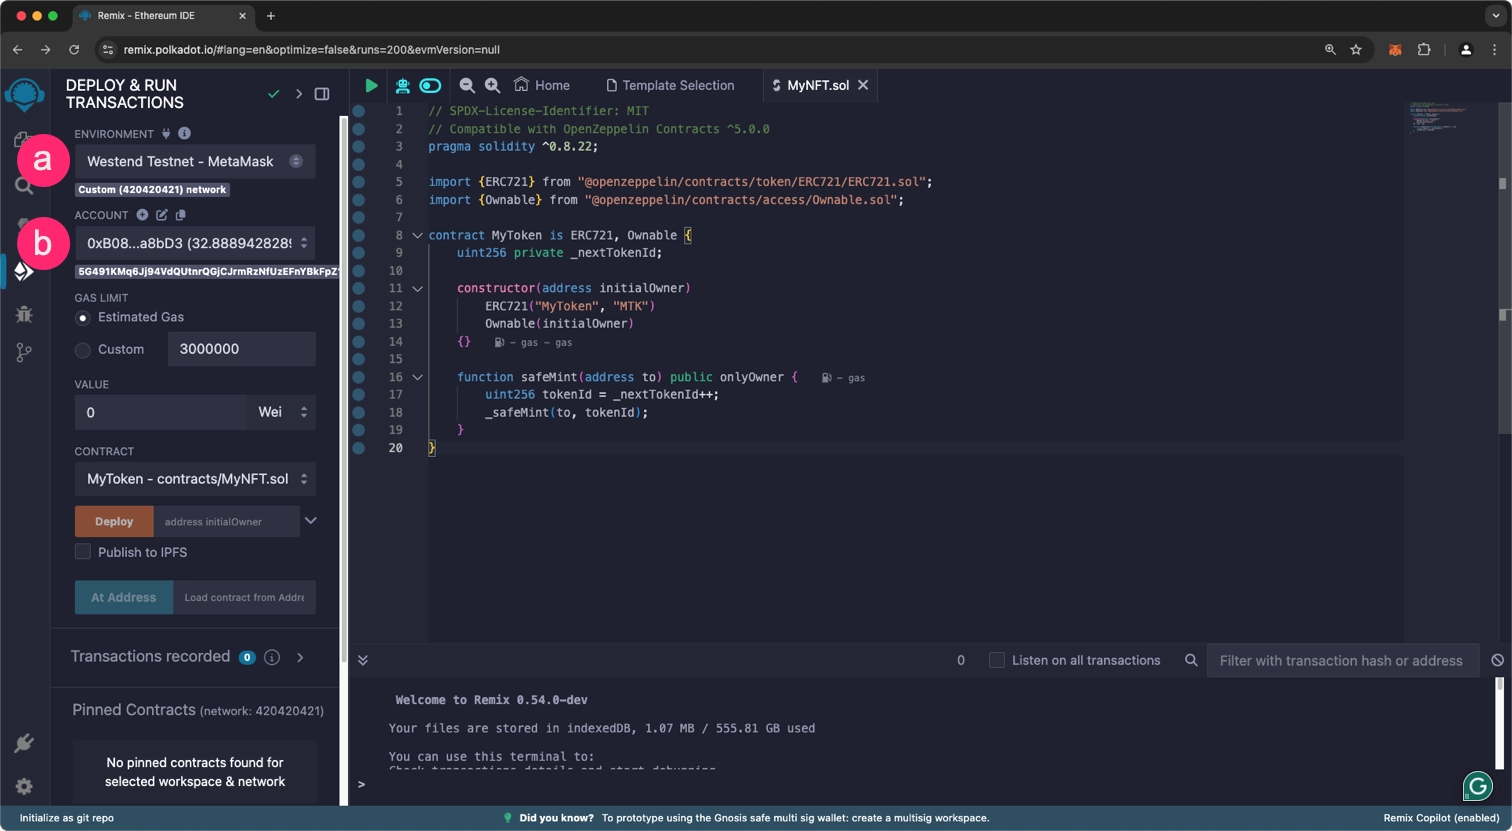
Select the Deploy & Run Transactions plugin from the left panel

-
Configure the deployment settings
- From the ENVIRONMENT dropdown, select Injected Provider - Talisman (check the Deploying Contracts section of the Remix IDE guide for more details)
- From the ACCOUNT dropdown, select the account you want to use for the deploy
-
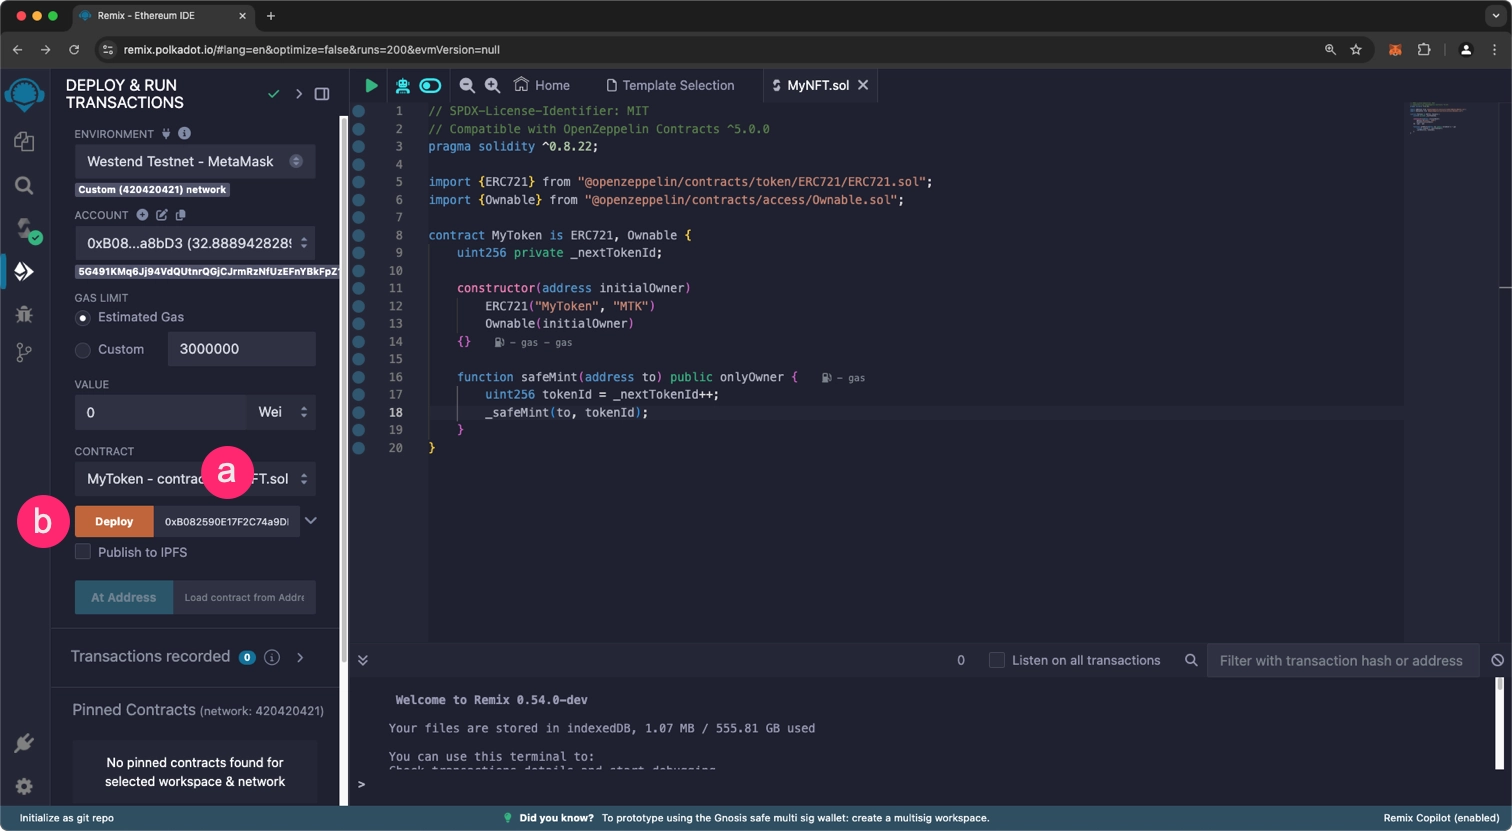
Configure the contract parameters
- Enter the address that will own the deployed NFT.
- Click the Deploy button to initiate the deployment
-
Talisman will pop up - review the transaction details. Click Approve to deploy your contract
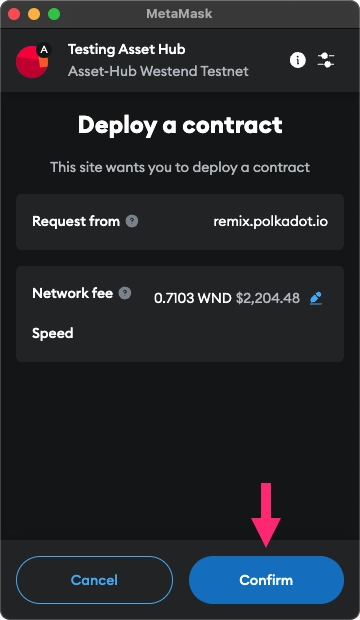
Deploying this contract requires paying gas fees in PAS tokens on the Polkadot Hub TestNet. Ensure your Talisman account is funded with sufficient PAS tokens from the faucet before confirming the transaction, check the Test Tokens section for more information. Gas fees cover the computational resources needed to deploy and execute the smart contract on the blockchain.
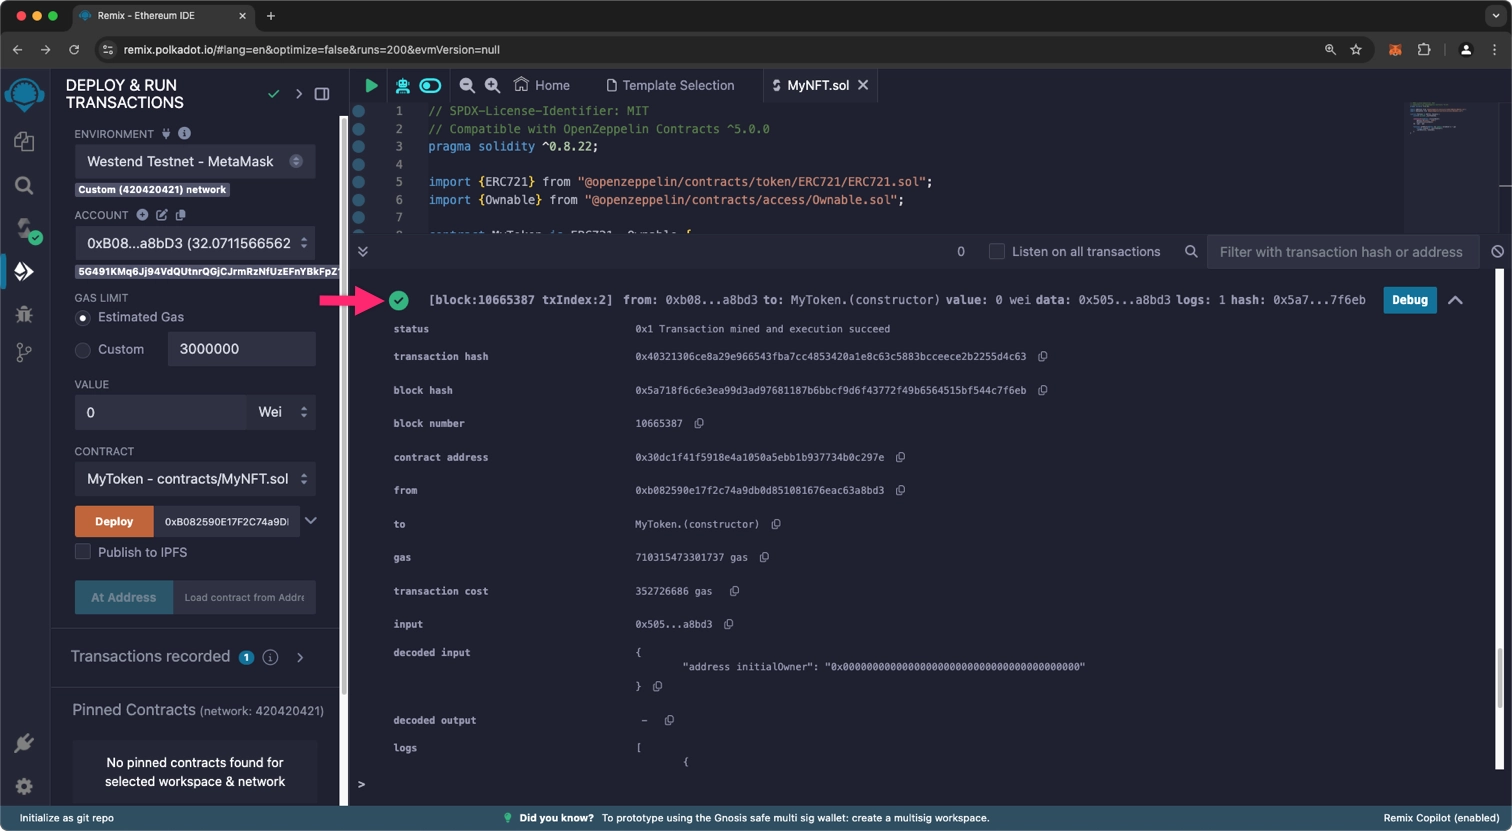
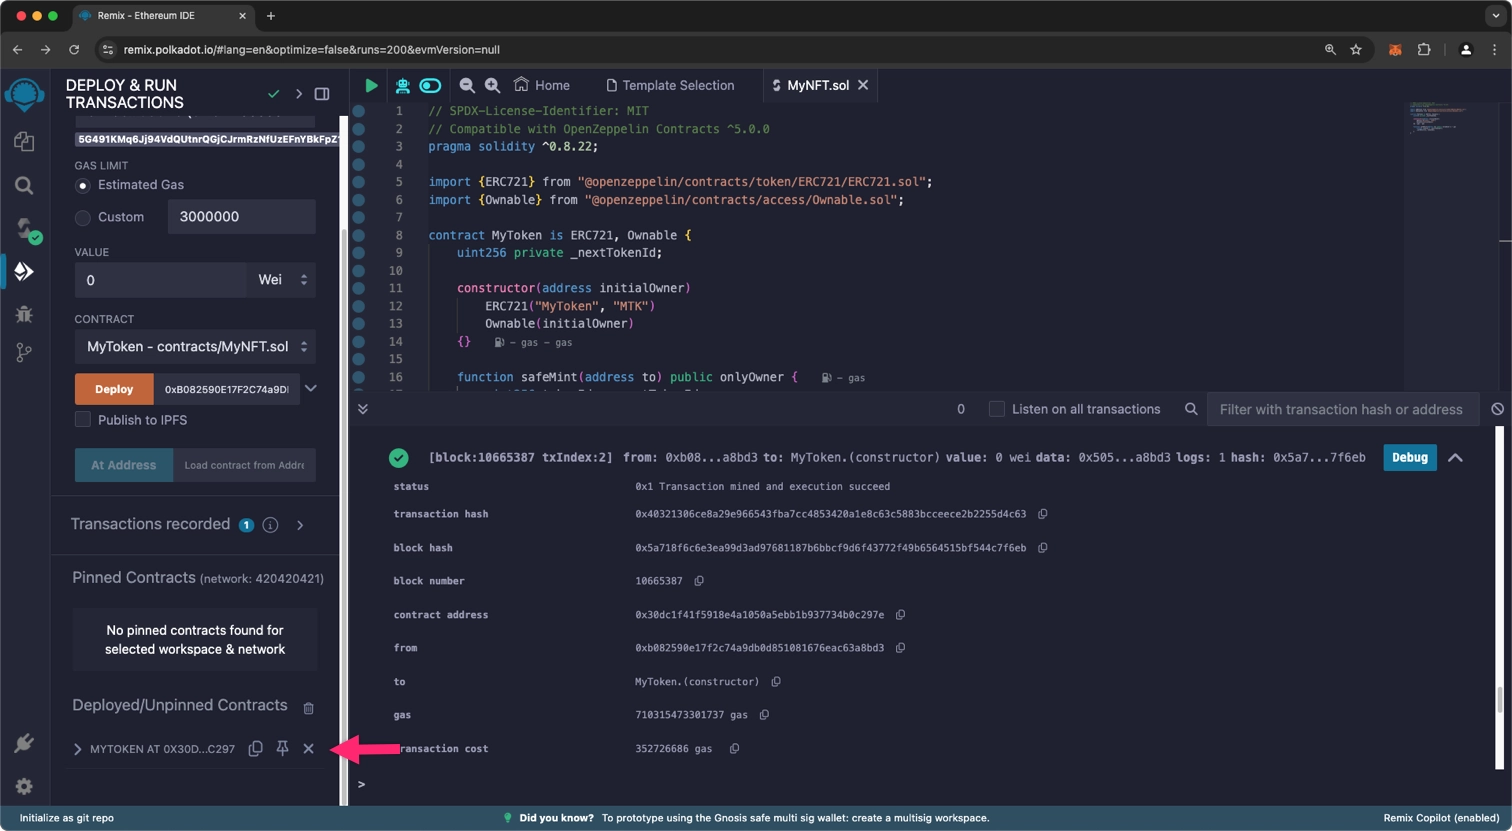
If the deployment process succeeded, you will see the following output in the terminal:
Interact with Your NFT Contract
Once deployed, you can interact with your contract through Remix:
-
Find your contract under Deployed/Unpinned Contracts, and click it to expand the available methods for the contract
-
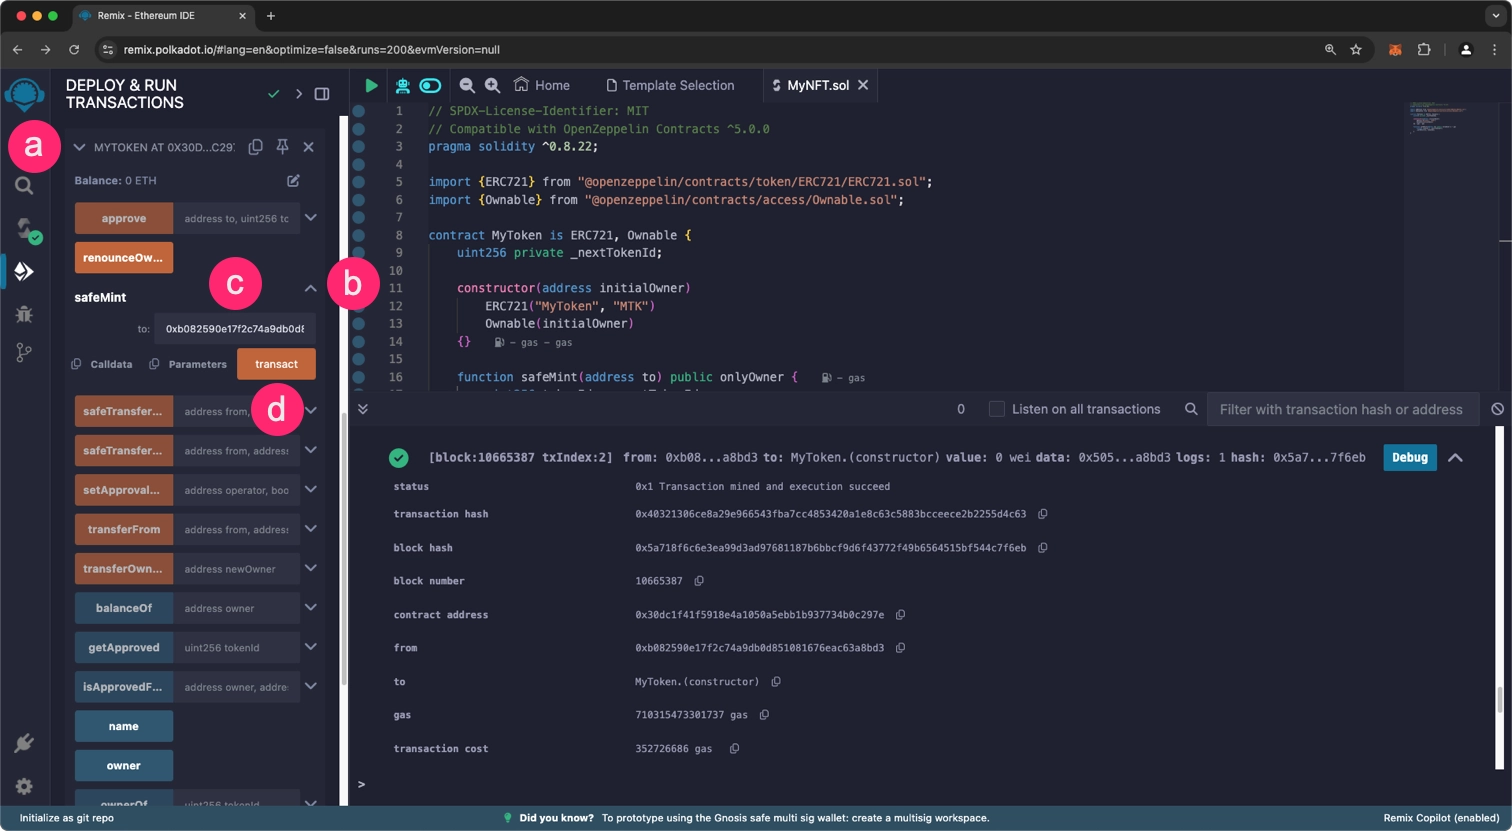
To mint an NFT
- Click on the contract to expand its associated methods
- Expand the safeMint function
- Enter the recipient address
- Click Transact
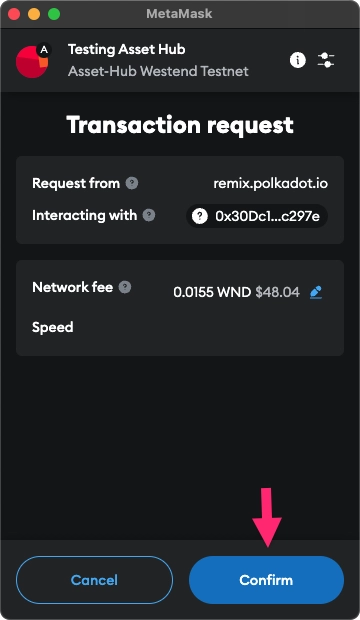
-
Click Approve to confirm the transaction in the Talisman popup
If the transaction is successful, the terminal will display the following output, which details the information about the transaction, including the transaction hash, the block number, the associated logs, and so on.
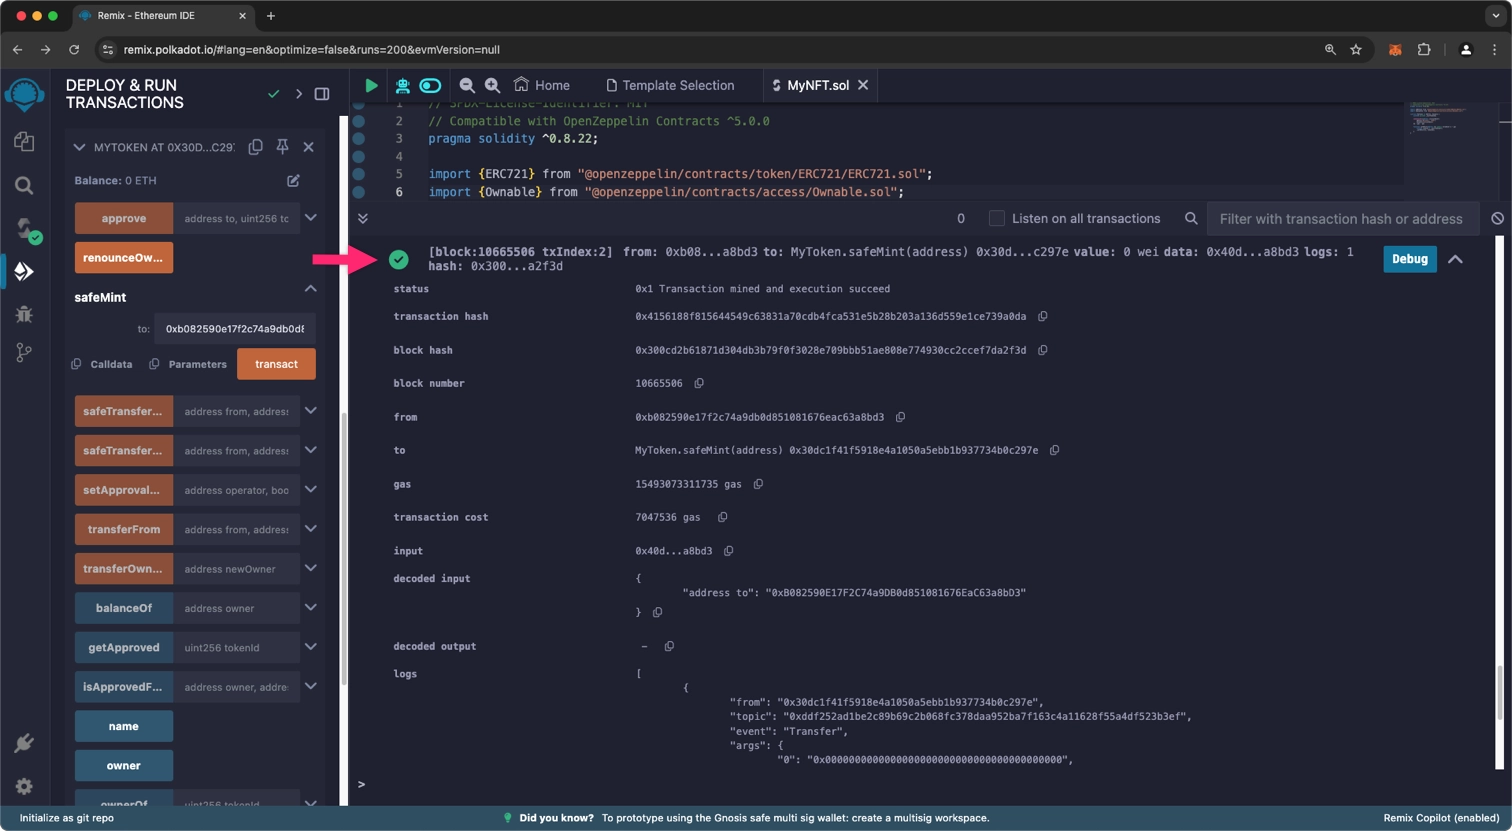
Feel free to explore and interact with the contract's other functions using the same approach - selecting the method, providing any required parameters, and confirming the transaction through Talisman when needed.
| Created: July 28, 2025