Opening HRMP Channels with System Parachains
Introduction
While establishing Horizontal Relay-routed Message Passing (HRMP) channels between regular parachains involves a two-step request and acceptance procedure, opening channels with system parachains follows a more straightforward approach.
System parachains are specialized chains that provide core functionality to the Polkadot network. Examples include Asset Hub for cross-chain asset transfers and Bridge Hub for connecting to external networks. Given their critical role, establishing communication channels with these system parachains has been optimized for efficiency and ease of use.
Any parachain can establish a bidirectional channel with a system chain through a single operation, requiring just one XCM message from the parachain to the relay chain.
Prerequisites
To successfully complete this process, you'll need to have the following in place:
- Access to a blockchain network consisting of:
- A relay chain
- A parachain
- An Asset Hub system chain
- A wallet containing enough funds to cover transaction fees on each of the participating chains
Procedure for Establishing HRMP Channel
This guide demonstrates opening an HRMP channel between parachain 2500 and system chain Asset Hub (parachain 1000) on the Rococo Local relay chain.
Step 1 - Fund Parachain Sovereign Account
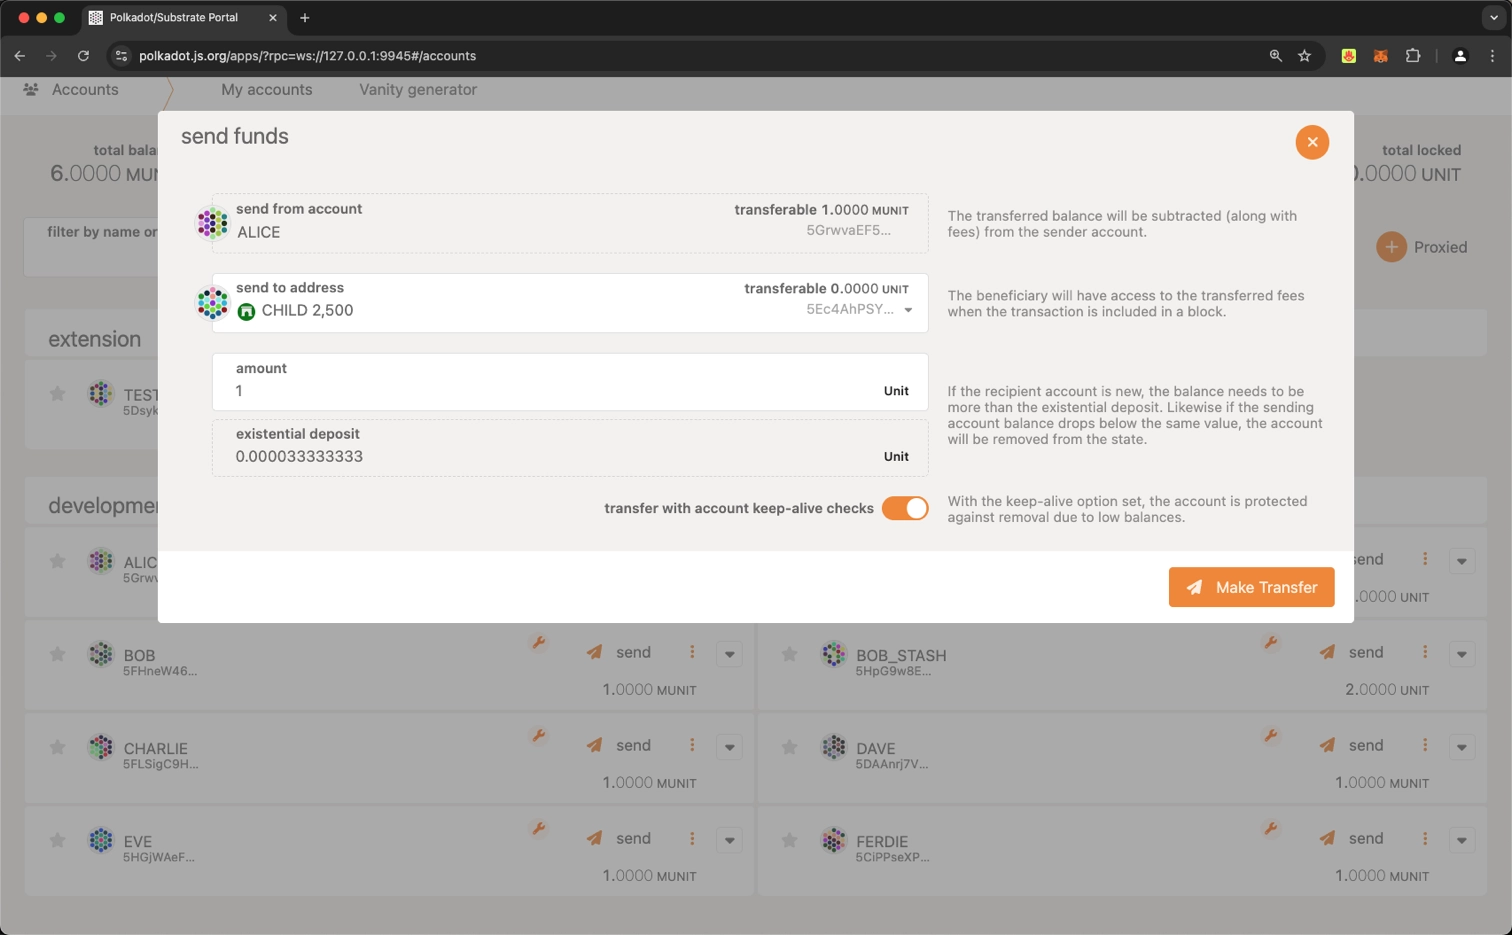
The sovereign account for parachain 2500 on the relay chain must be funded so it can take care of any XCM transact fees.
Use Polkadot.js Apps UI to connect to the relay chain and transfer funds from your account to the parachain 2500 sovereign account.
Calculating Parachain Sovereign Account
To generate the sovereign account address for a parachain, you'll need to follow these steps:
-
Determine if the parachain is an "up/down" chain (parent or child) or a "sibling" chain:
-
Up/down chains use the prefix
0x70617261(which decodes tob"para") -
Sibling chains use the prefix
0x7369626c(which decodes tob"sibl")
-
-
Calculate the u32 scale encoded value of the parachain ID:
- Parachain 2500 would be encoded as
c4090000
- Parachain 2500 would be encoded as
-
Combine the prefix and parachain ID encoding to form the full sovereign account address:
The sovereign account of parachain 2500 in relay chain will be
0x70617261c4090000000000000000000000000000000000000000000000000000and the SS58 format of this address is5Ec4AhPSY2GEE4VoHUVheqv5wwq2C1HMKa7c9fVJ1WKivX1Y
To perform this conversion, you can also use the "Para ID" to Address section in Substrate Utilities.
Step 2 - Create Establish Channel with System Extrinsic
-
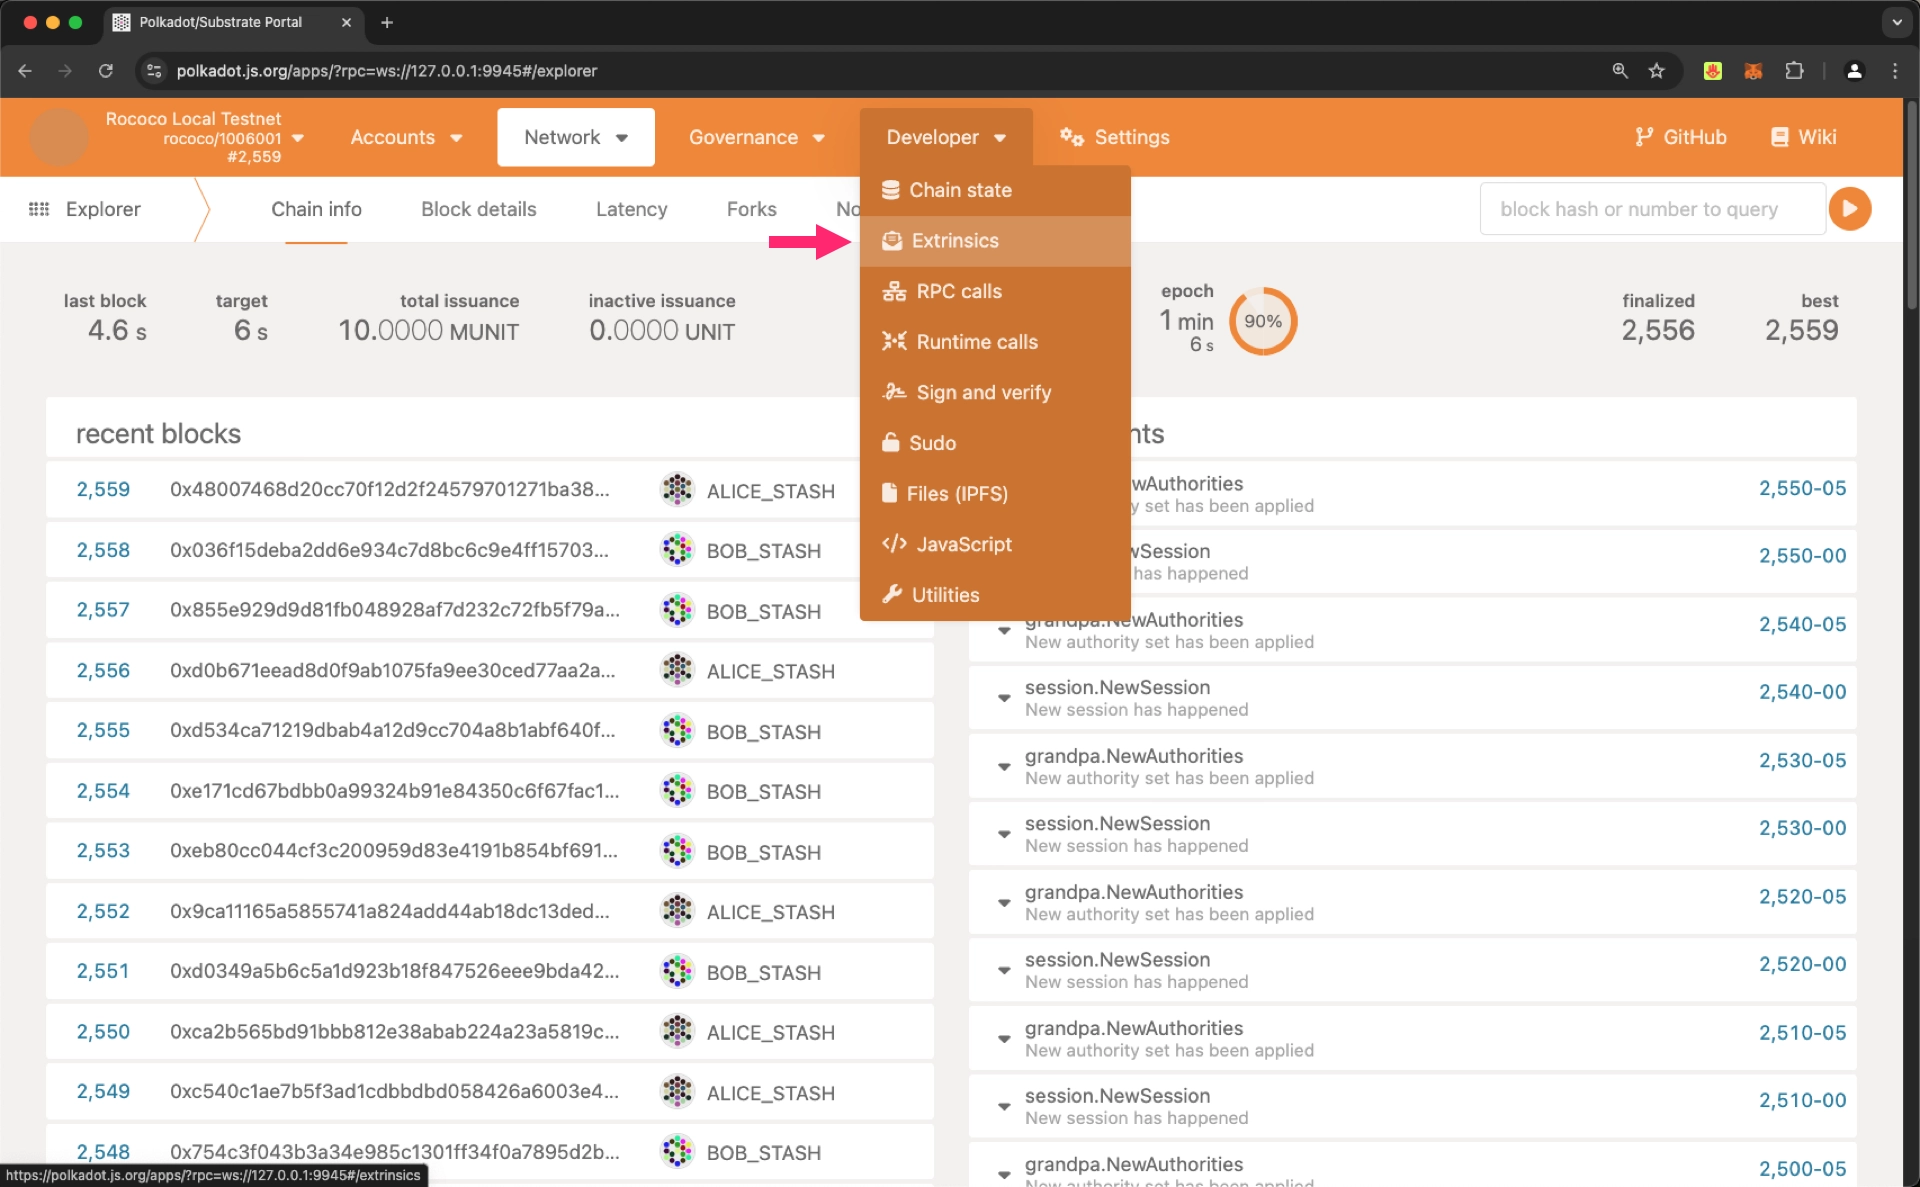
In Polkadot.js Apps, connect to the relay chain, navigate to the Developer dropdown and select the Extrinsics option
-
Construct an
establish_channel_with_systemextrinsic call- Select the
hrmppallet - Choose the
establish_channel_with_systemextrinsic - Fill in the parameters:
target_system_chain- parachain ID of the target system chain (in this case, 1000)
- Copy the encoded call data
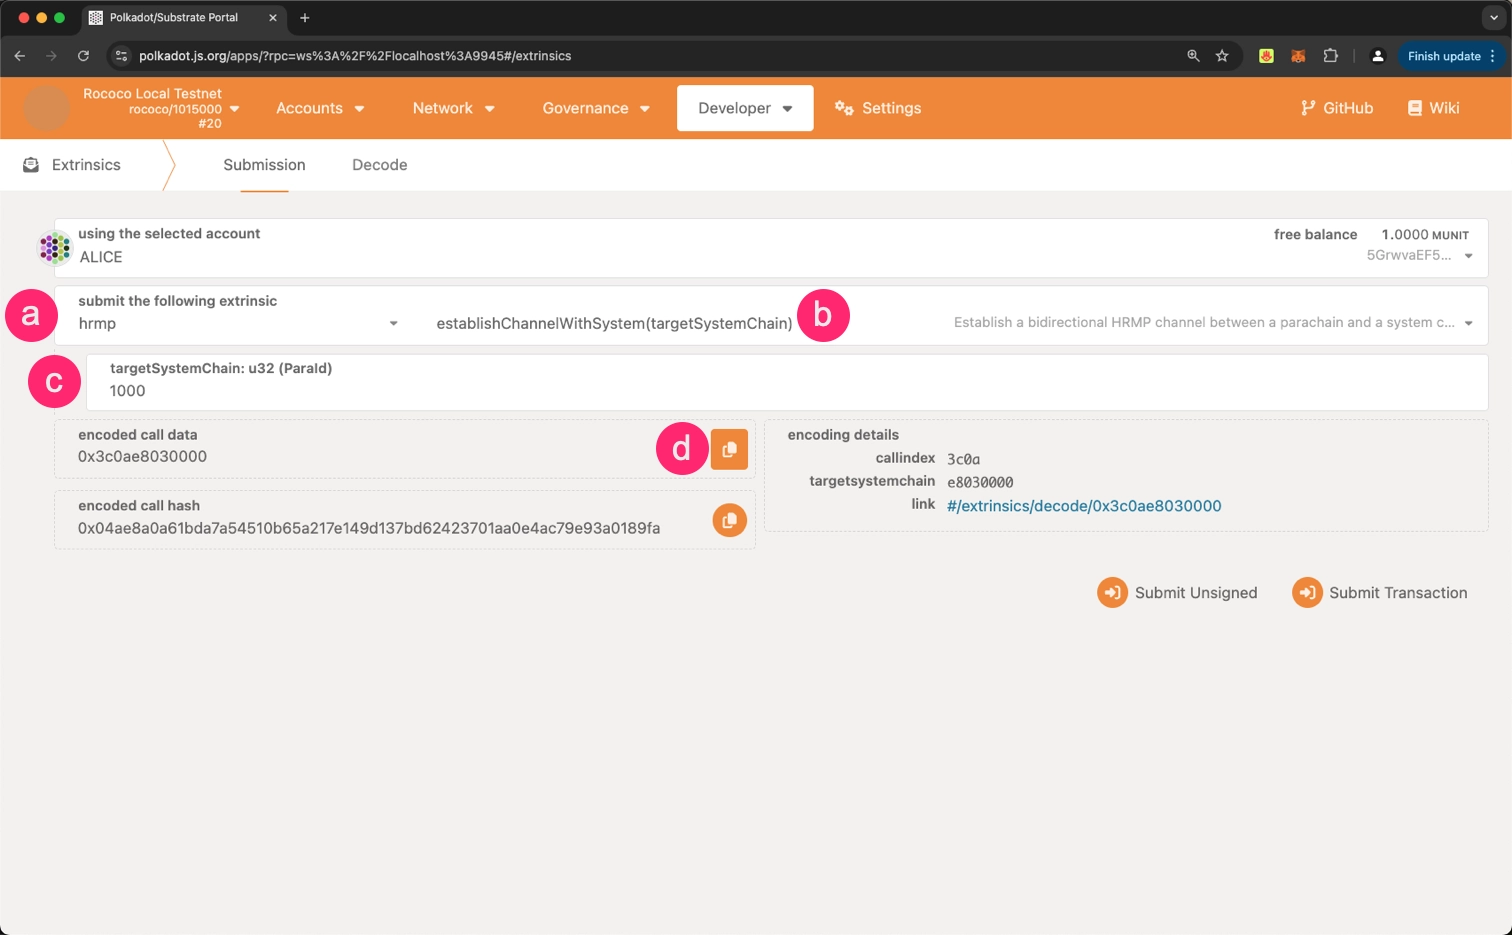 The encoded call data for establishing a channel with system parachain 1000 should be
 0x3c0ae8030000
- Select the
Step 3 - Crafting and Submitting the XCM Message
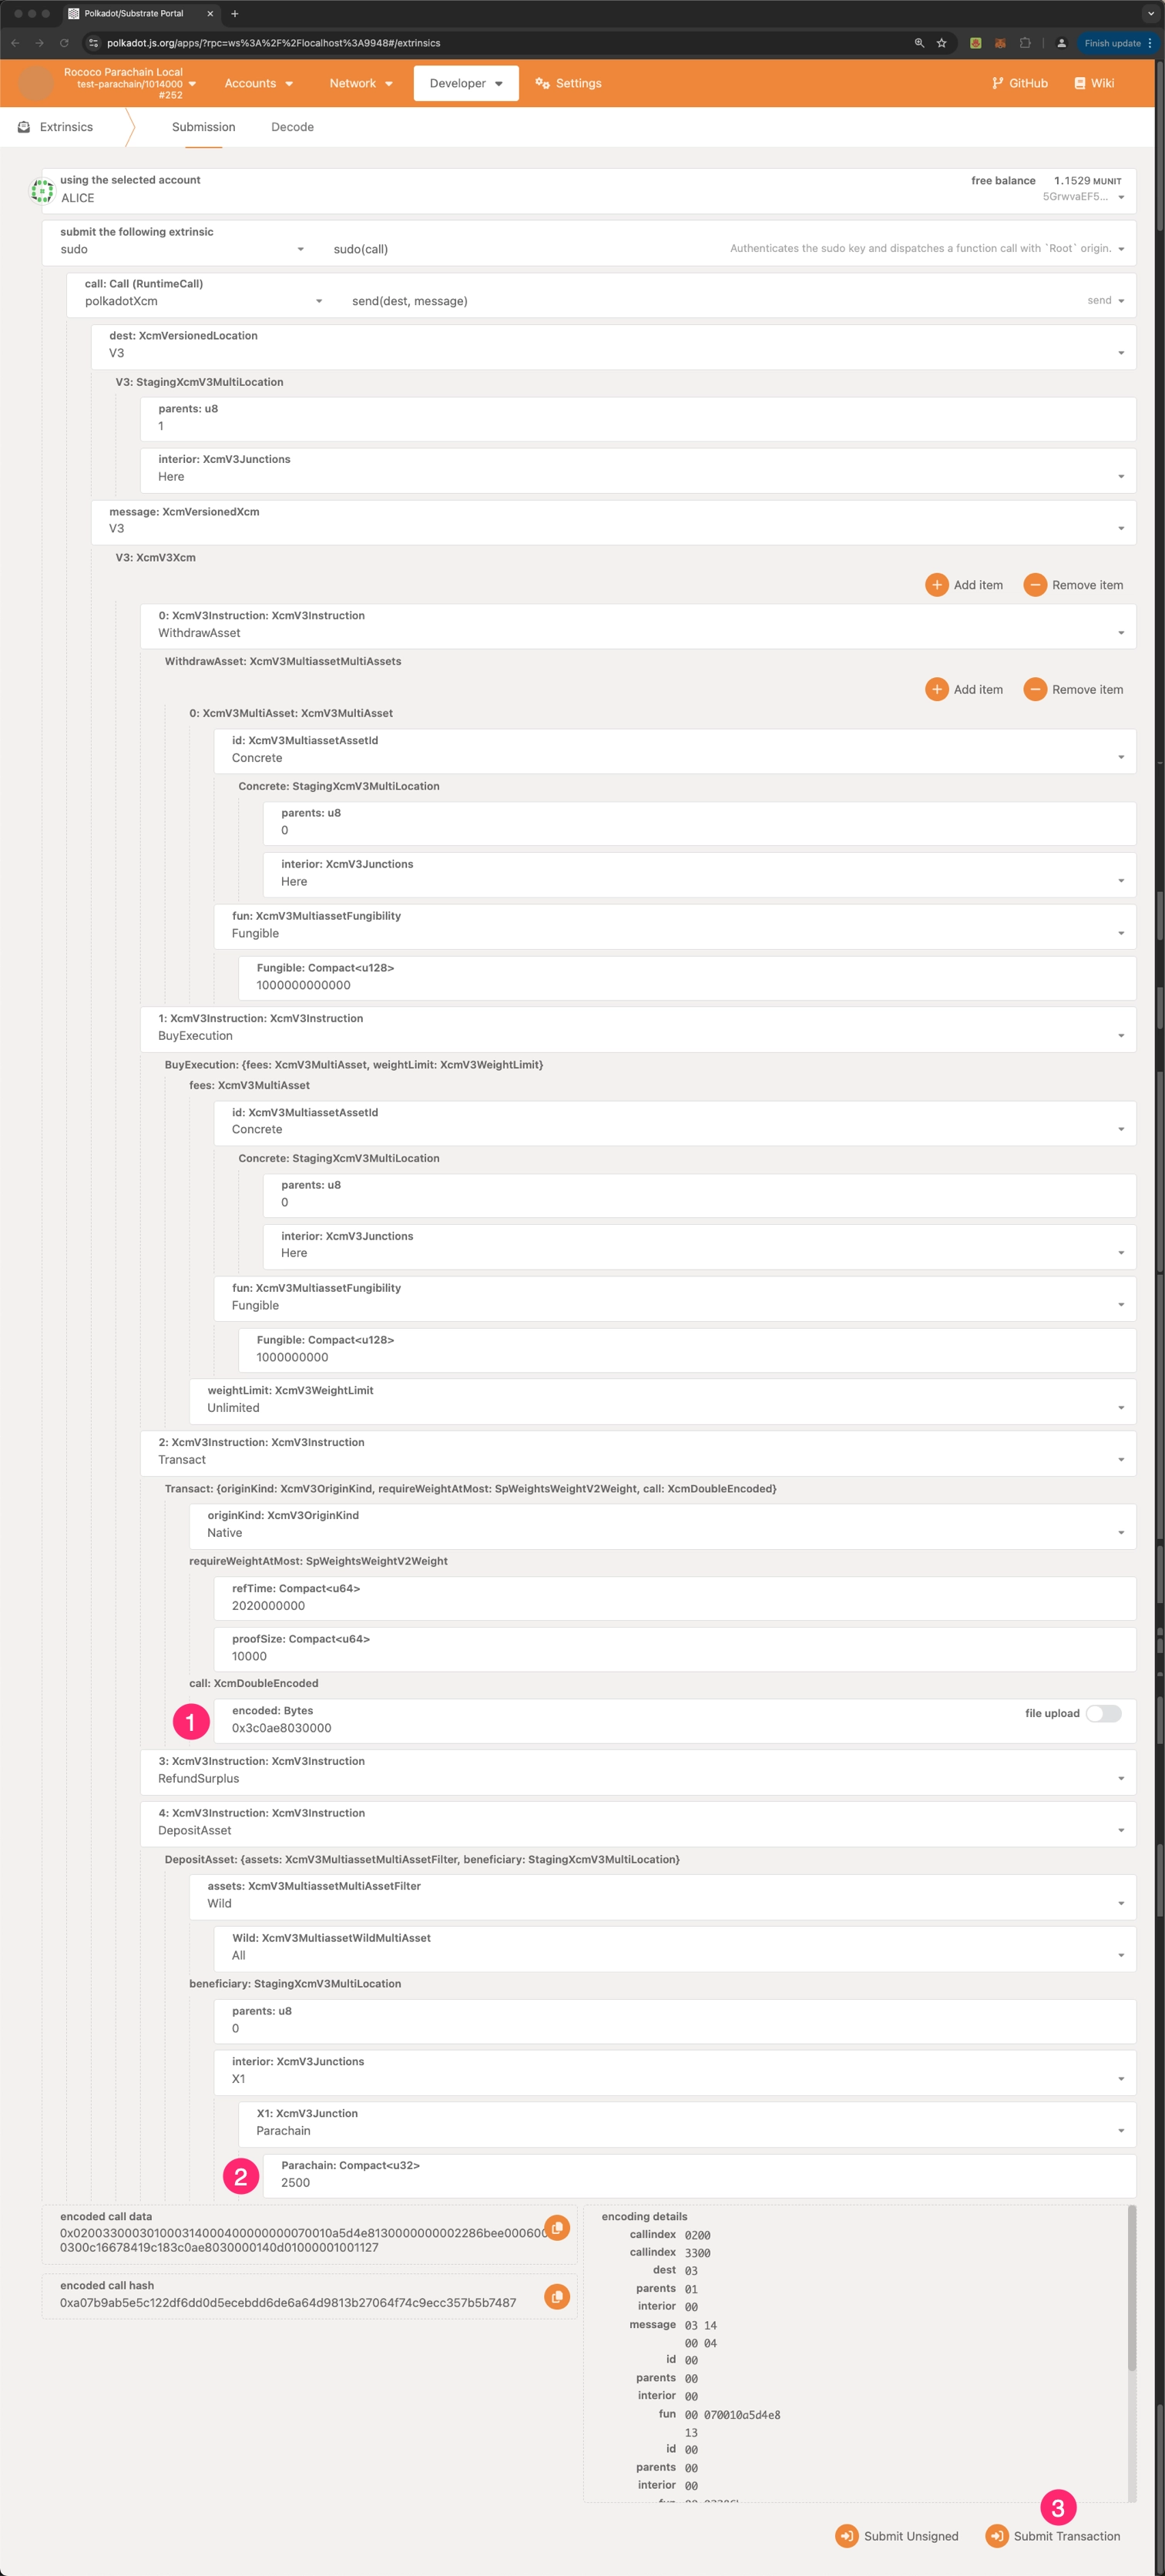
Connect to parachain 2500 using Polkadot.js Apps to send the XCM message to the relay chain. Input the necessary parameters as illustrated in the image below. Make sure to:
- Insert your previously encoded
establish_channel_with_systemcall data into thecallfield - Provide beneficiary details
- Dispatch the XCM message to the relay chain by clicking the Submit Transaction button
Note
The exact process and parameters for submitting this XCM message may vary depending on your specific parachain and relay chain configurations. Always refer to the most current documentation for your particular network setup.
After successfully submitting the XCM message to the relay chain, two HRMP channels should be created, establishing bidirectional communication between parachain 2500 and system chain 1000. To verify this, follow these steps:
-
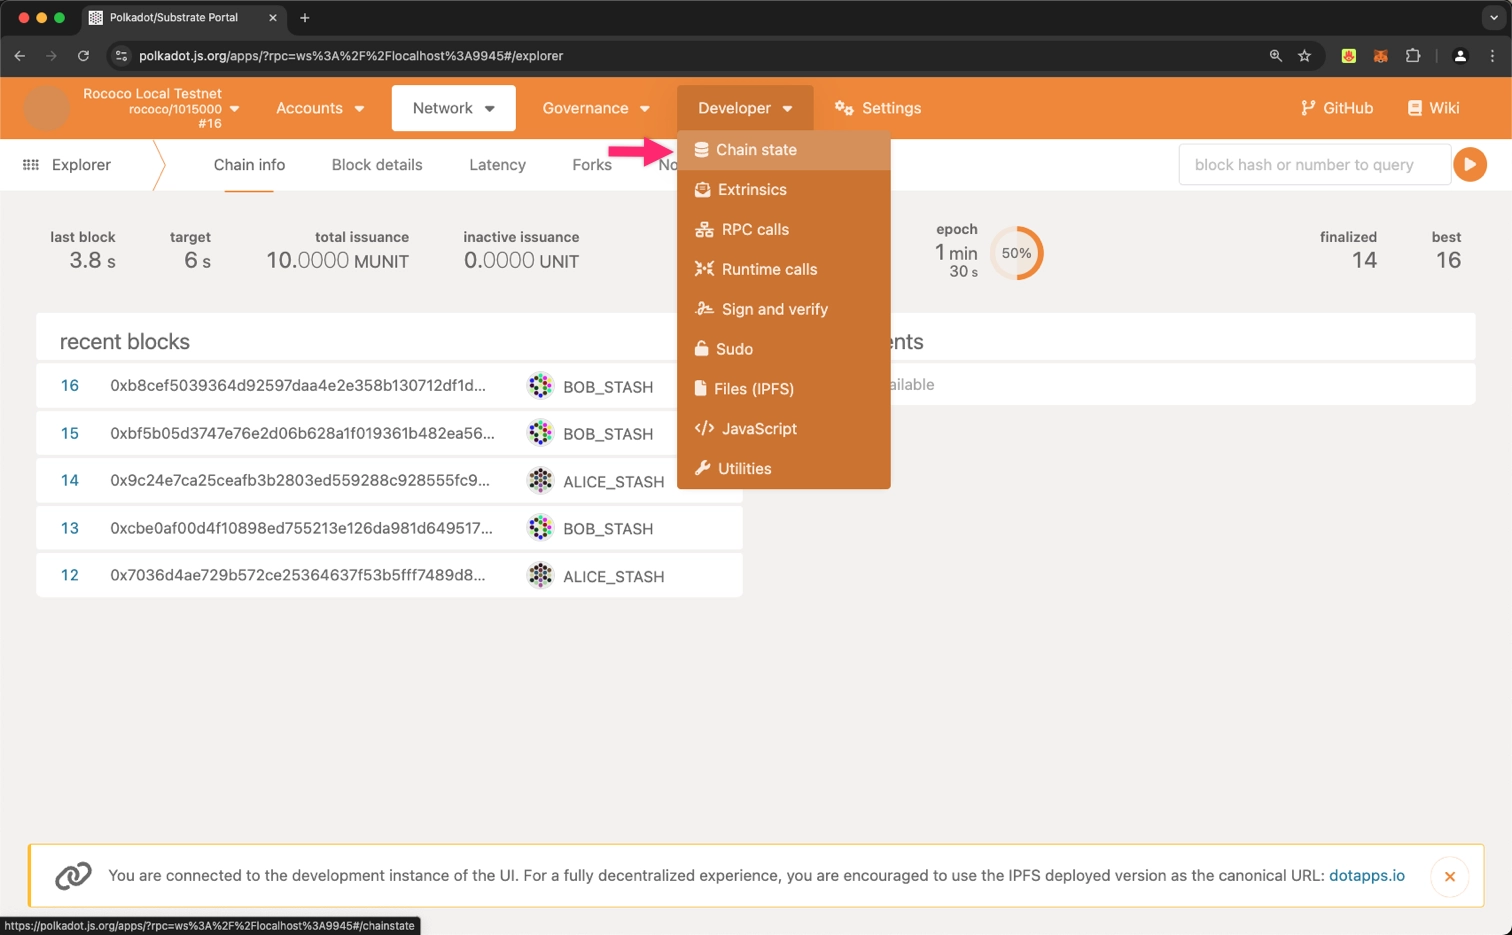
Using Polkadot.js Apps, connect to the relay chain and navigate to the Developer dropdown, then select Chain state
-
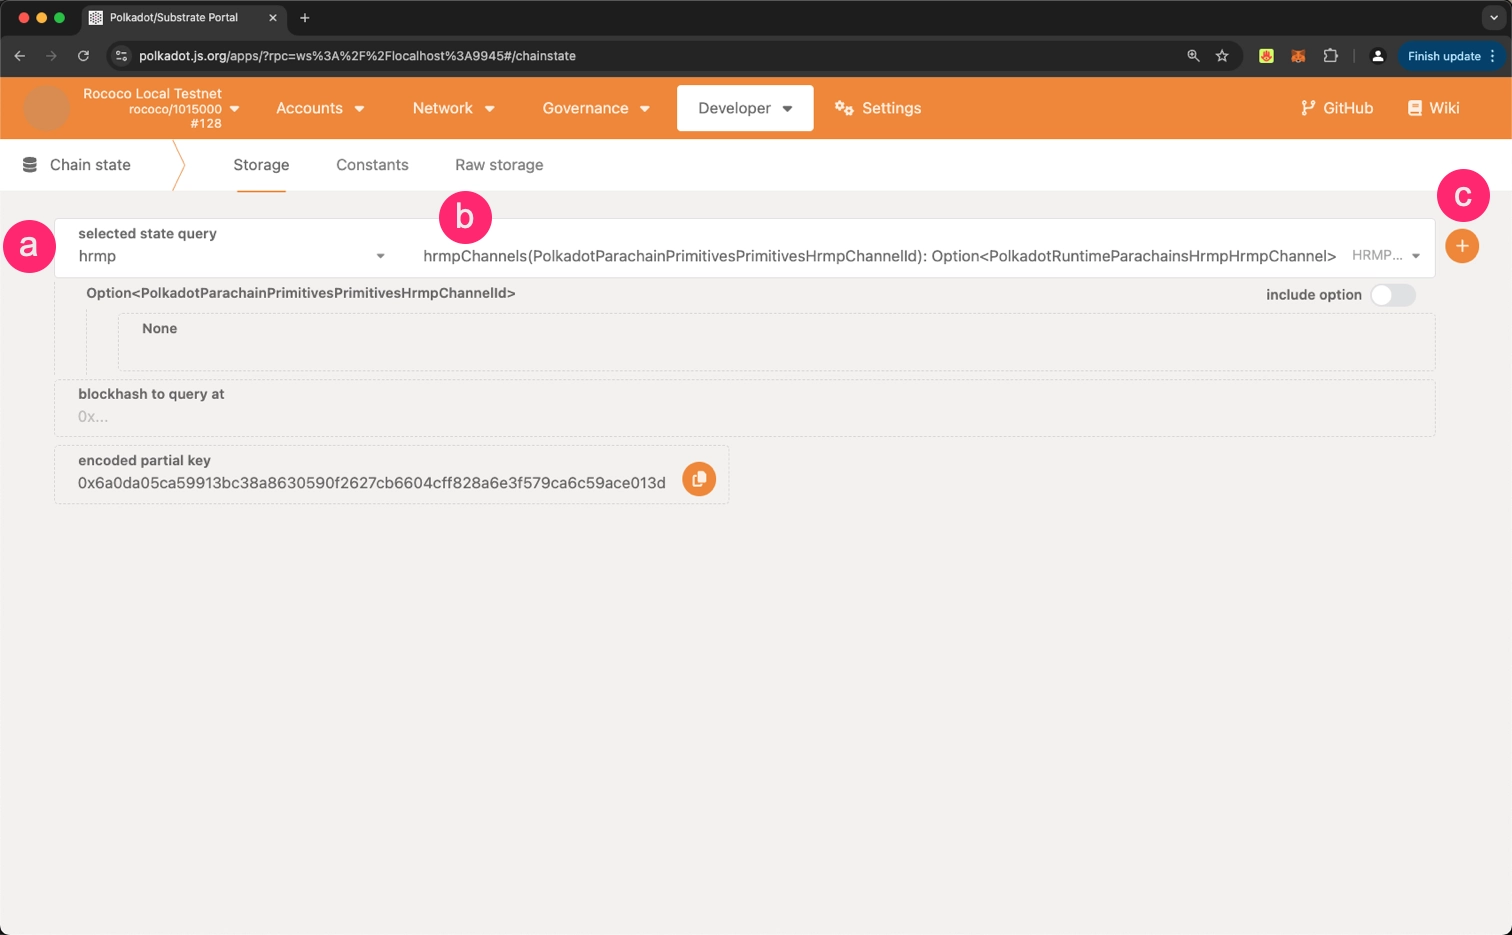
Query the HRMP channels
- Select
hrmpfrom the options - Choose the
hrmpChannelscall - Click the + button to execute the query
- Select
-
Examine the query results. You should see output similar to the following:
[
  [
    [
      {
        "sender": 1000,
        "recipient": 2500
      }
    ],
    {
      "maxCapacity": 8,
      "maxTotalSize": 8192,
      "maxMessageSize": 1048576,
      "msgCount": 0,
      "totalSize": 0,
      "mqcHead": null,
      "senderDeposit": 0,
      "recipientDeposit": 0
    }
  ],
  [
    [
      {
        "sender": 2500,
        "recipient": 1000
      }
    ],
    {
      "maxCapacity": 8,
      "maxTotalSize": 8192,
      "maxMessageSize": 1048576,
      "msgCount": 0,
      "totalSize": 0,
      "mqcHead": null,
      "senderDeposit": 0,
      "recipientDeposit": 0
    }
  ]
]
The output confirms the successful establishment of two HRMP channels:
- From chain 1000 (system chain) to chain 2500 (parachain)
- From chain 2500 (parachain) to chain 1000 (system chain)
This bidirectional channel enables direct communication between the system chain and the parachain, allowing for cross-chain message passing.