Register a Local Asset on Asset Hub
Introduction
As detailed in the Asset Hub Overview page, Asset Hub accommodates two types of assets: local and foreign. Local assets are those that were created in Asset Hub and are identifiable by an integer ID. On the other hand, foreign assets originate from a sibling parachain and are identified by a Multilocation.
This guide will take you through the steps of registering a local asset on the Asset Hub parachain.
Prerequisites
Before you begin, ensure you have access to the Polkadot.js Apps interface and a funded wallet with DOT or KSM.
- For Polkadot Asset Hub, you would need a deposit of 10 DOT and around 0.201 DOT for the metadata
- For Kusama Asset Hub, the deposit is 0.1 KSM and around 0.000669 KSM for the metadata
You need to ensure that your Asset Hub account balance is a bit more than the sum of those two deposits, which should seamlessly account for the required deposits and transaction fees.
Steps to Register a Local Asset
To register a local asset on the Asset Hub parachain, follow these steps:
-
Open the Polkadot.js Apps interface and connect to the Asset Hub parachain using the network selector in the top left corner
- You may prefer to test local asset registration on TestNet before registering the asset on a MainNet hub. If you still need to set up a local testing environment, review the Environment setup section for instructions. Once the local environment is set up, connect to the Local Node (Chopsticks) available on
ws://127.0.0.1:8000 - For the live network, connect to the
Asset Hubparachain. Either Polkadot or Kusama Asset Hub can be selected from the dropdown list, choosing the desired RPC provider
- You may prefer to test local asset registration on TestNet before registering the asset on a MainNet hub. If you still need to set up a local testing environment, review the Environment setup section for instructions. Once the local environment is set up, connect to the Local Node (Chopsticks) available on
-
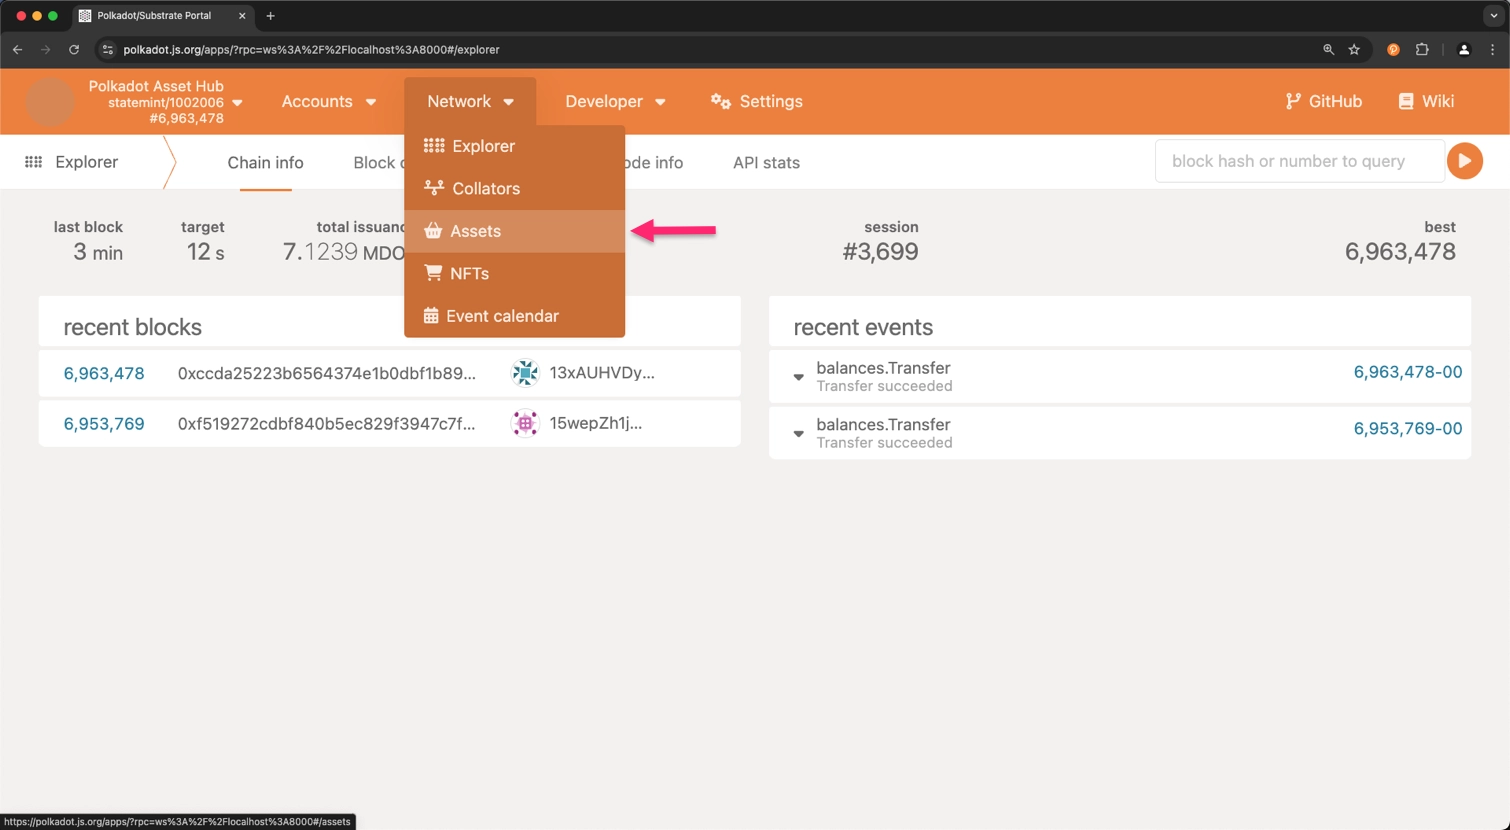
Click on the Network tab on the top navigation bar and select Assets from the dropdown list
-
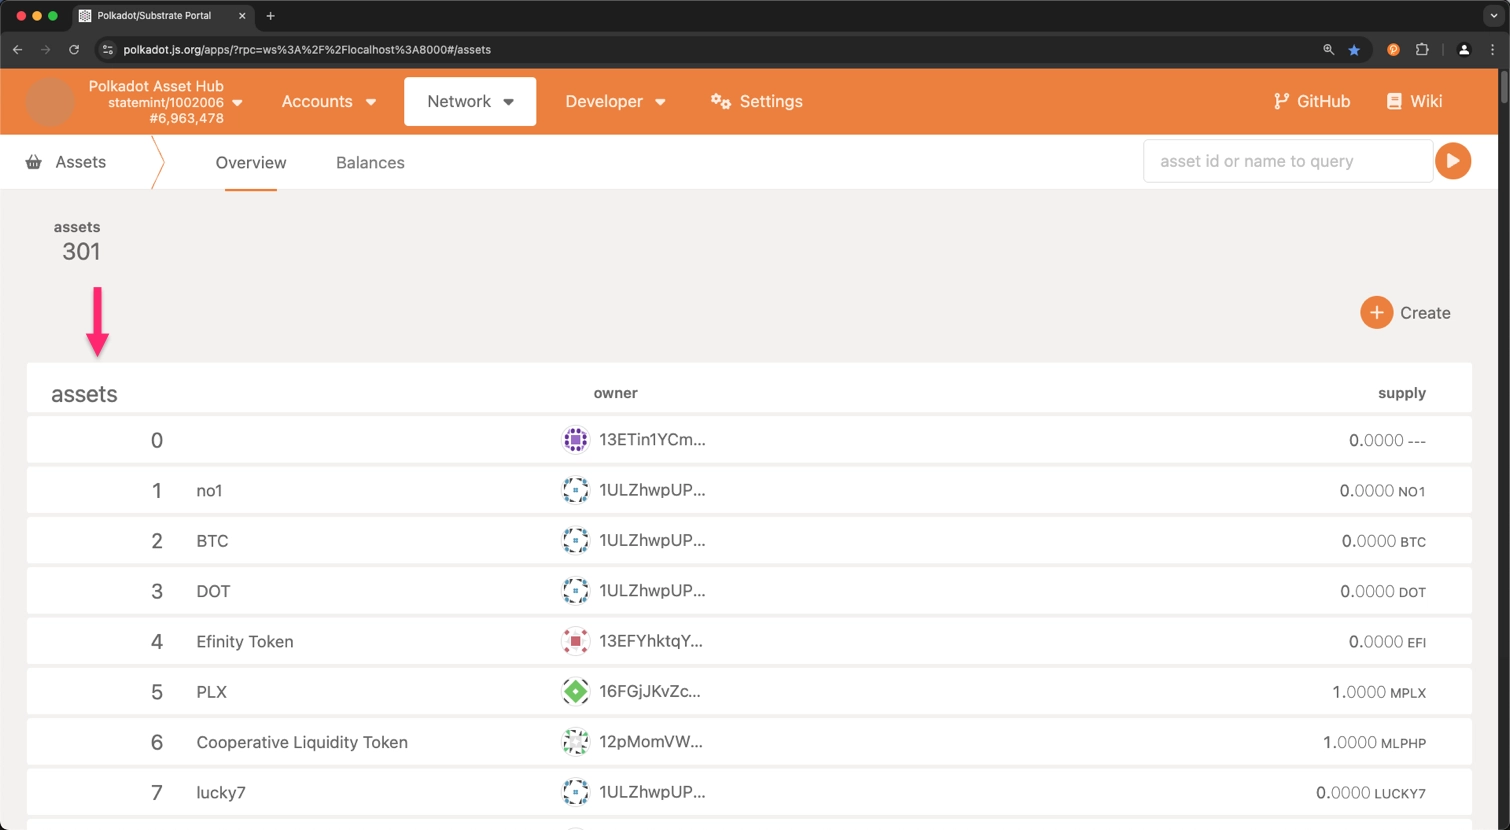
Now, you need to examine all the registered asset IDs. This step is crucial to ensure that the asset ID you are about to register is unique. Asset IDs are displayed in the assets column
-
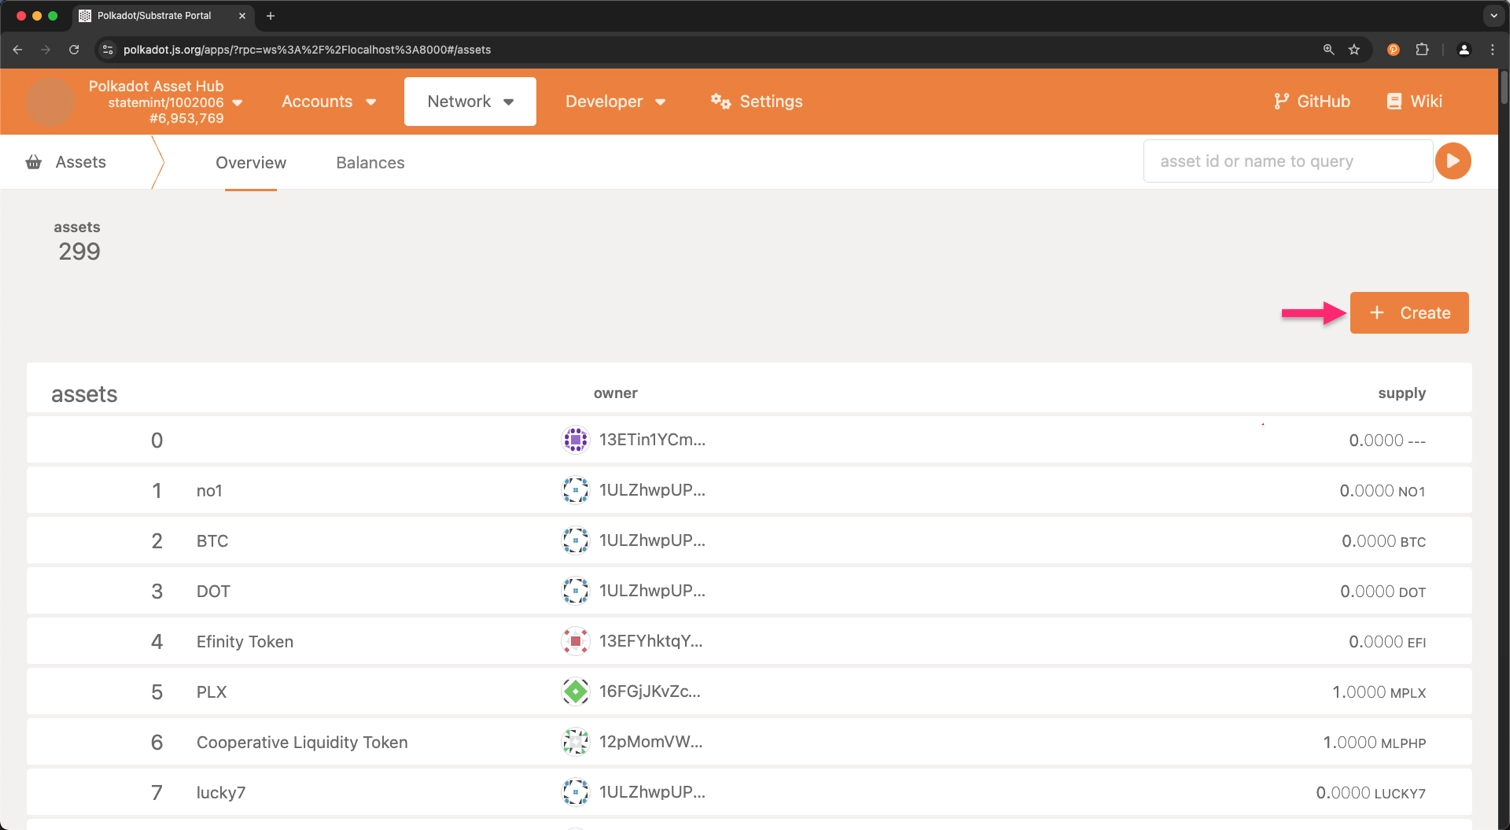
Once you have confirmed that the asset ID is unique, click on the Create button on the top right corner of the page
-
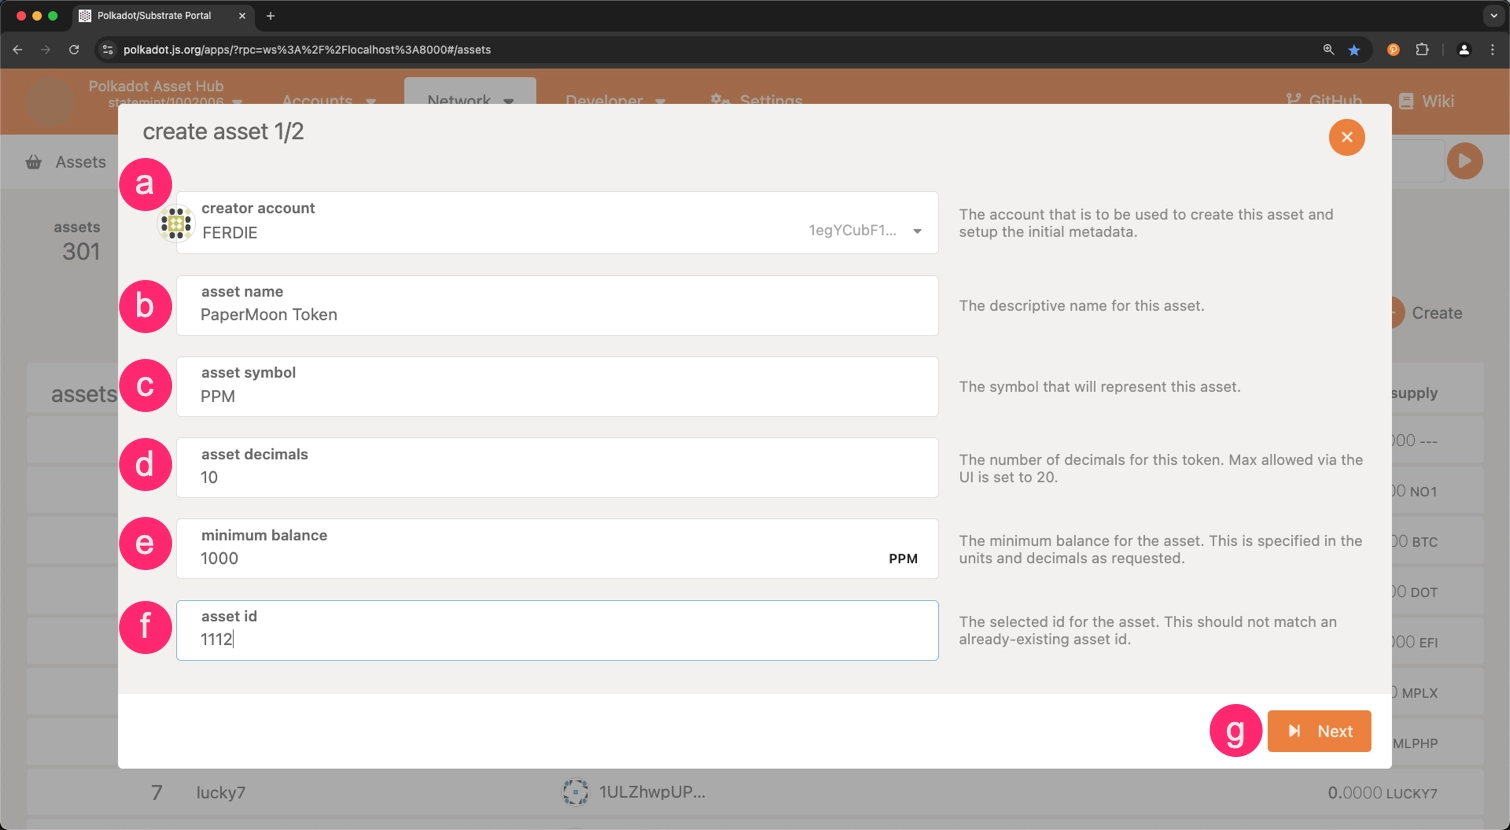
Fill in the required fields in the Create Asset form:
- creator account - the account to be used for creating this asset and setting up the initial metadata
- asset name - the descriptive name of the asset you are registering
- asset symbol - the symbol that will be used to represent the asset
- asset decimals - the number of decimal places for this token, with a maximum of 20 allowed through the user interface
- minimum balance - the minimum balance for the asset. This is specified in the units and decimals as requested
- asset ID - the selected id for the asset. This should not match an already-existing asset id
- Click on the Next button
-
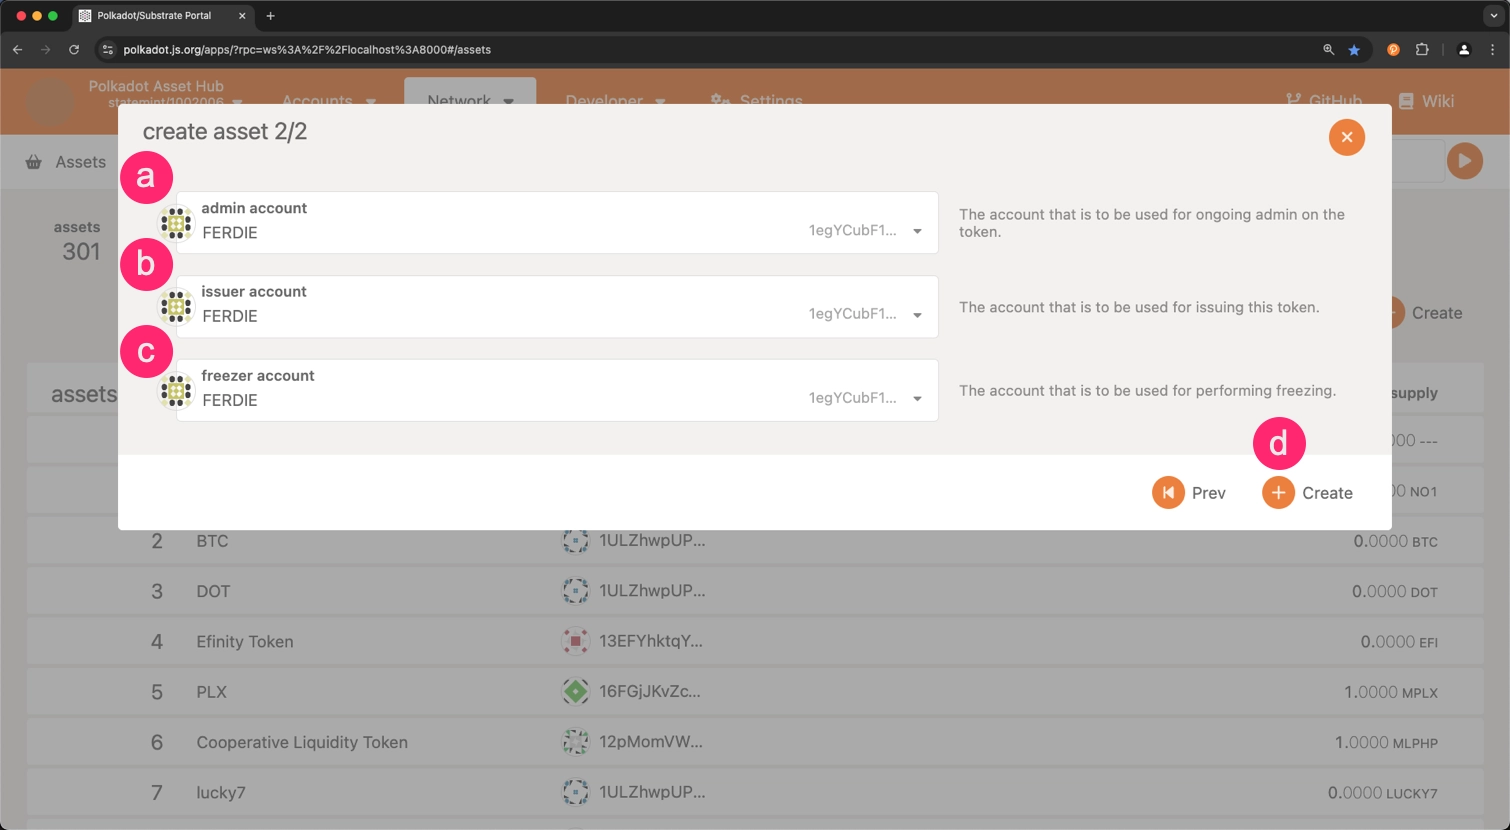
Choose the accounts for the roles listed below:
- admin account - the account designated for continuous administration of the token
- issuer account - the account that will be used for issuing this token
- freezer account - the account that will be used for performing token freezing operations
- Click on the Create button
-
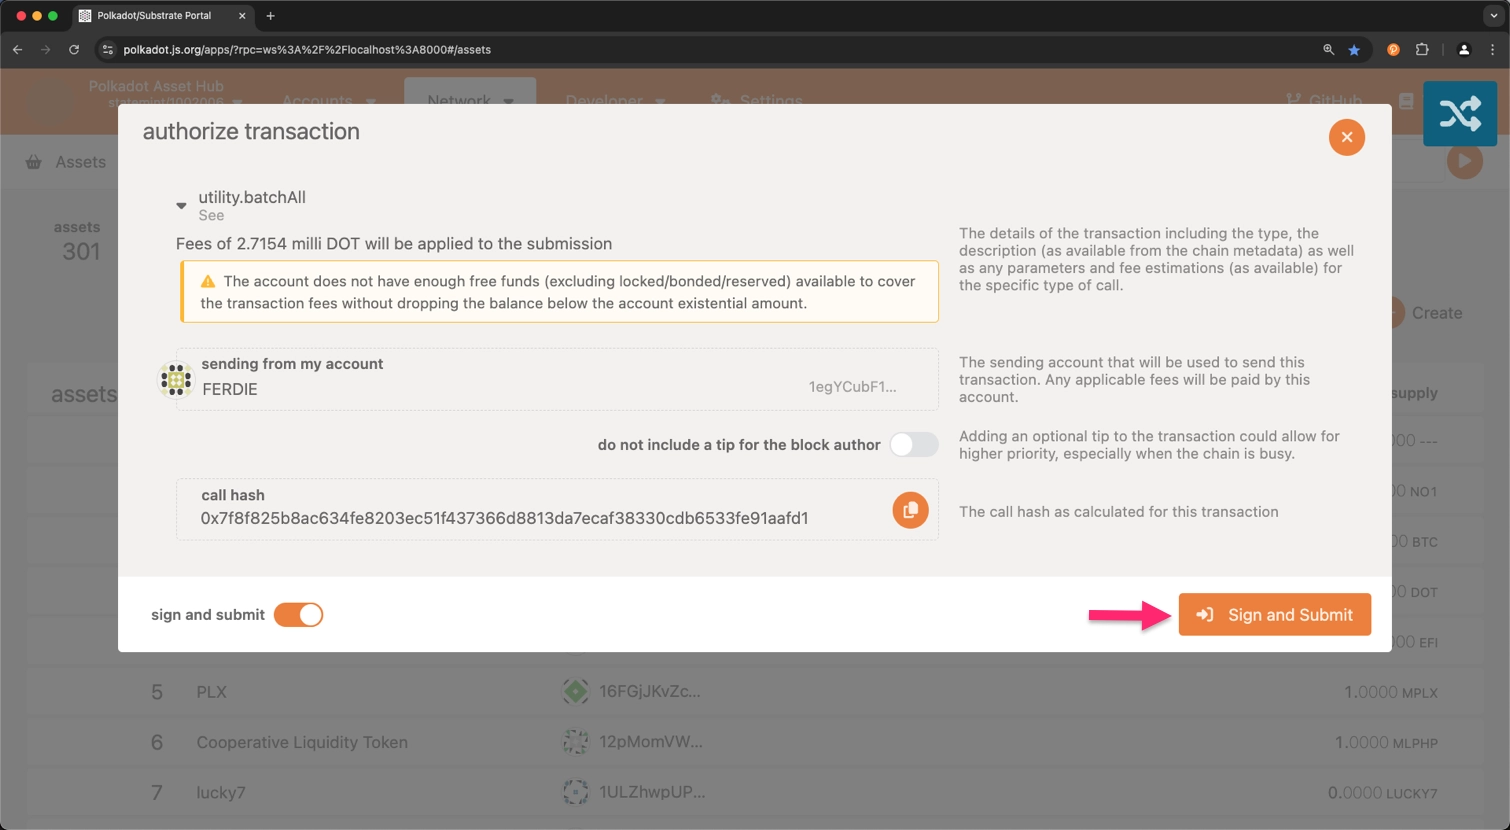
Click on the Sign and Submit button to complete the asset registration process
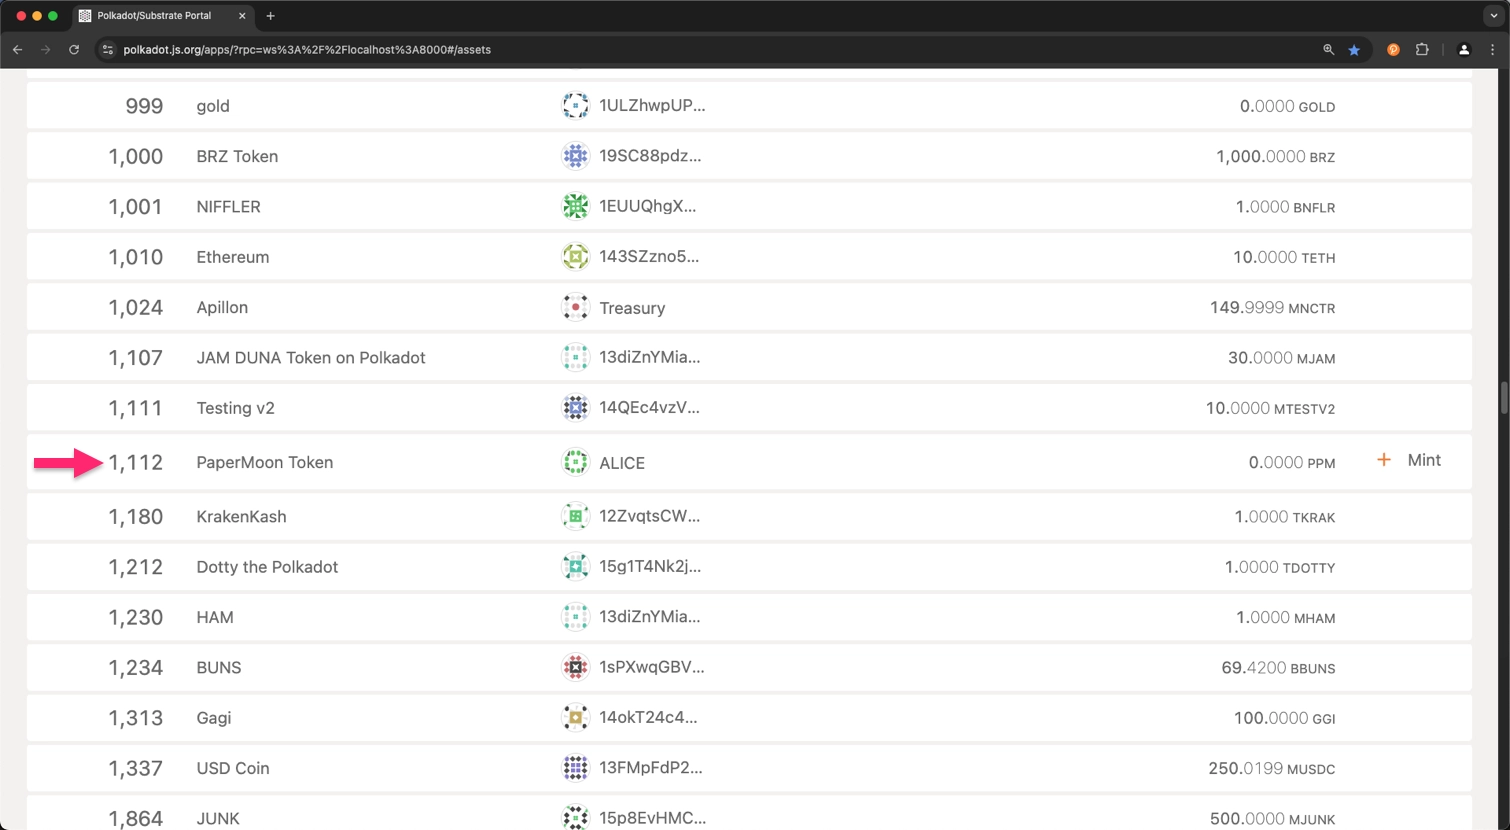
Verify Asset Registration
After completing these steps, the asset will be successfully registered. You can now view your asset listed on the Assets section of the Polkadot.js Apps interface.
Note
Take into consideration that the Assets section’s link may differ depending on the network you are using. For the local environment, the link will be ws://127.0.0.1:8000/#/assets.
In this way, you have successfully registered a local asset on the Asset Hub parachain.
For an in-depth explanation of Asset Hub and its features, please refer to the Polkadot Wiki page on Asset Hub.
Test Setup Environment
You can set up a local parachain environment to test the asset registration process before deploying it on the live network. This guide uses chopsticks to simulate that process. For further information on chopsticks usage, refer to the Chopsticks documentation.
To set up a test environment, execute the following command:
npx @acala-network/chopsticks \
--config=https://raw.githubusercontent.com/AcalaNetwork/chopsticks/master/configs/polkadot-asset-hub.yml
Note
The above command will spawn a lazy fork of Polkadot Asset Hub with the latest block data from the network. If you need to test Kusama Asset Hub, replace polkadot-asset-hub.yml with kusama-asset-hub.yml in the command.
An Asset Hub instance is now running locally, and you can proceed with the asset registration process. Note that the local registration process does not differ from the live network process. Once you have a successful TestNet transaction, you can use the same steps to register the asset on MainNet.